23 Pixie Cut Back Views That Show the Full Picture
Most pixie cut photos show the front, but the back of the head is where the structure of the cut is easiest to read. From behind you can see how the hair is graduated up from the nape, how the neckline meets your natural hairline, whether the crown is kept flat or built up, and whether there is a visible step where one length ends and another begins. It is also the view you rarely get in a bathroom mirror.
Those details affect how the cut ages between salon visits. A tight neckline can lose its edge within two or three weeks, while a softer finish tends to change less obviously as it grows. A crown built for lift depends on your density and on the direction your hair grows there.
The 23 back views below each highlight something different: how a neckline is shaped, how weight is distributed, how a cut grows out, or what changes with curls, fine hair or gray. A short guide to the terms comes first, and a decision guide and stylist questions follow the list.
What to Look for in a Pixie Back View
Start at the bottom. The nape is the area at the base of the skull, and the neckline is the edge where hair stops and skin begins. That edge can follow your natural hairline, be cut into a straight line, or come to a point, and each choice grows out differently. A neckline that follows your natural hairline usually looks softer as it lengthens, while cut-in shapes such as a straight line or a V show growth sooner because the sharp edge blurs. Many people also have a whorl or uneven growth at the nape, and a stylist has to work with it, not against it.
Moving up, tapering means the hair gets gradually shorter toward the neckline, and a fade is a tighter taper that reaches the skin. Graduation is a related idea that builds shape instead of removing it: shorter lengths at the base are stacked under longer ones above, so the hair sits with a slight curve or lift. Together they decide how much weight stays at the back and where it sits.
The occipital area is the rounded part at the back of the skull, and it matters because graduated or stacked cuts either follow that curve or fight it. Above it sits the crown, the highest point at the back, which is also where many people have a cowlick. Its direction affects any crown lift.
A weight line is the visible edge where length or density changes, such as the step between an undercut and the hair above it. Some cuts blend that line away, and others leave it visible on purpose.
Finally, consider grow-out. A pixie is short enough that small changes show quickly, and the neckline tends to lose its edge before anything else. Each entry below says what to expect. If you would rather narrow the list first, the decision guide after the entries pairs common priorities with shapes.
Classic Tapered Nape Pixie
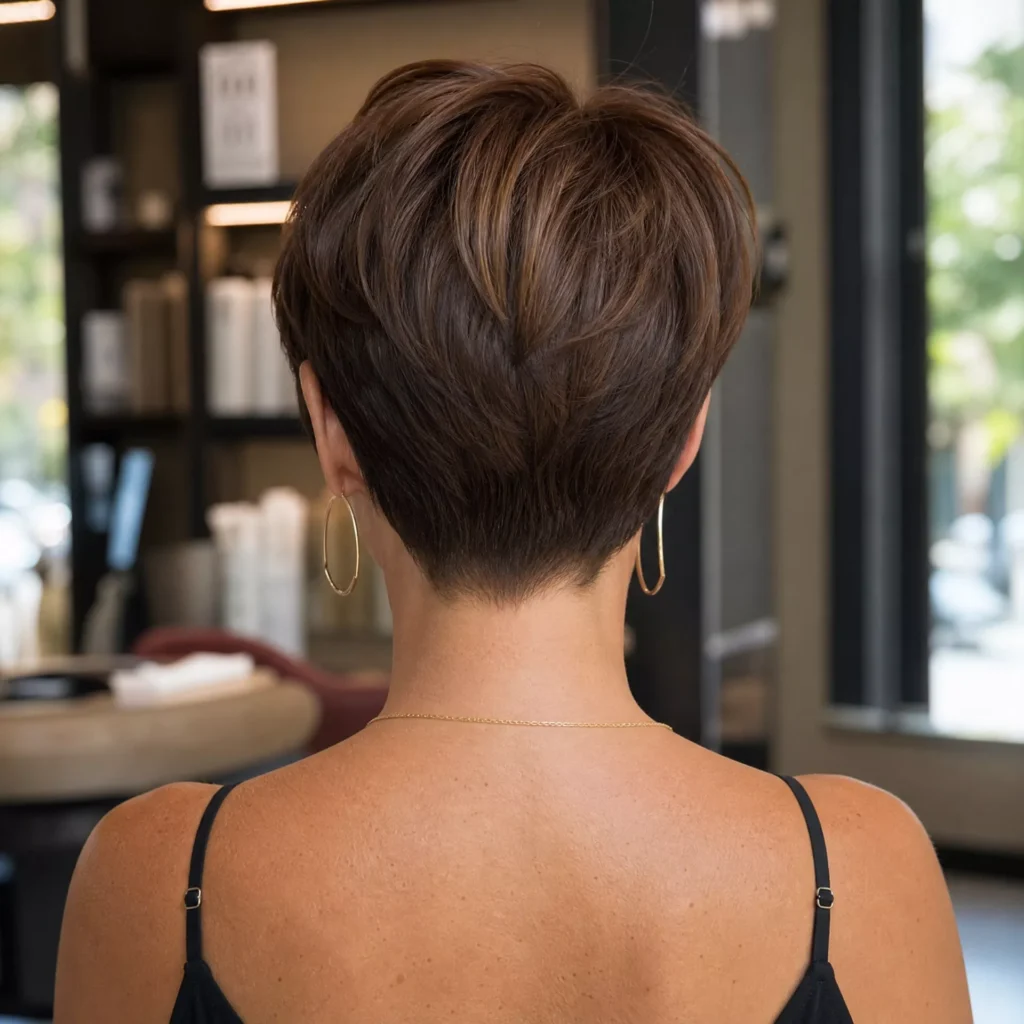
The classic taper is graduated in small steps, so the hair shortens as it nears the neckline and ends in a soft edge instead of a hard line. How far up that graduation starts is worth discussing. A taper that begins low keeps more length through the back, while one that starts higher exposes more of the nape and gives a more compact shape.
Grow-out is the practical side. The gradual transition lets the shape hold for a while, but the neckline will fuzz and lengthen, and many people refresh a tapered nape roughly every four to six weeks, depending on how fast their hair grows and how neat they like the edge.
Shaved Undercut Pixie Back View
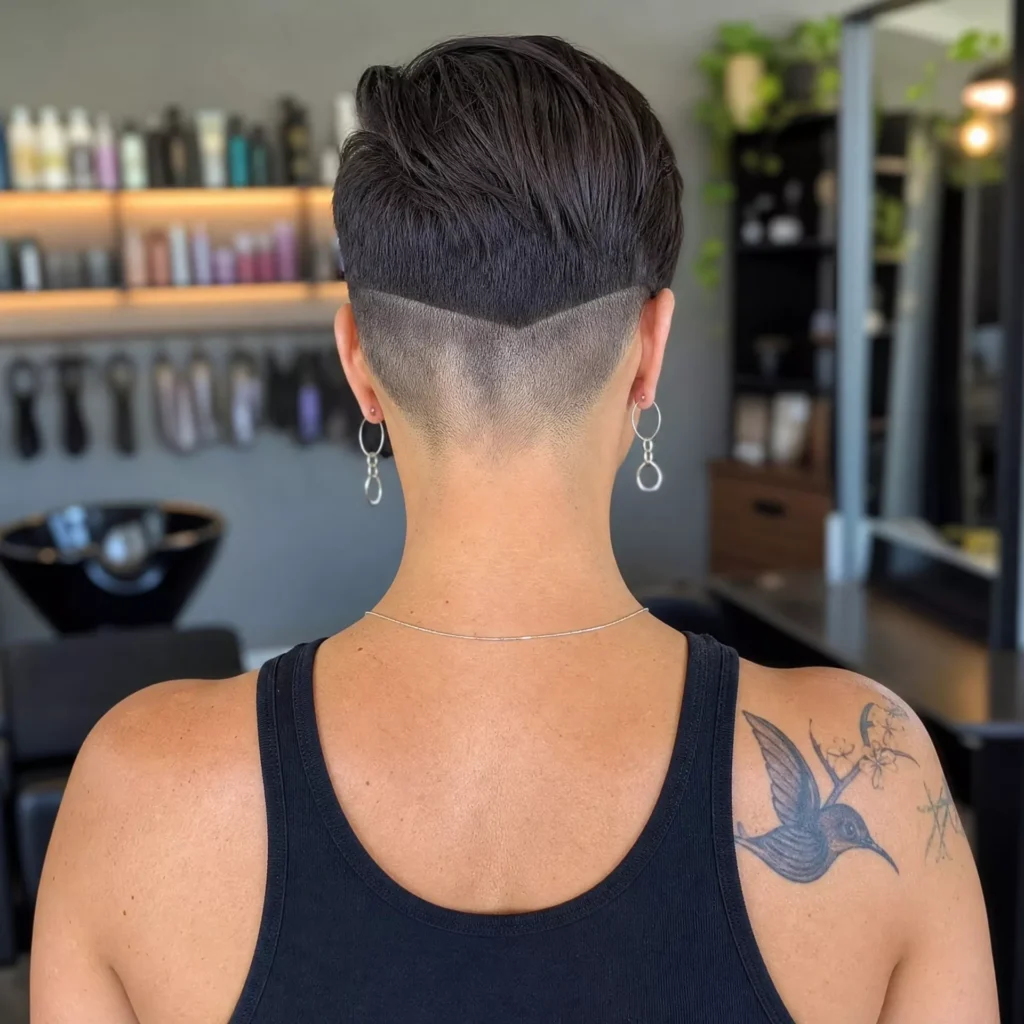
The shaved lower section creates a strong contrast with the longer hair above it, so the separation is especially visible from the rear. That contrast is the appeal, and it is also the commitment. The undercut has to be kept short with clippers, and regrowth shows within a couple of weeks as a fuzzy shadow, so touch-ups often come every three to four weeks.
Two decisions shape how it looks. One is how high the shaved section rises: a low one stays hidden under the hair above it, while a higher one shows whenever the top is lifted or tucked. The other is how much length the top has to cover it. If you are unsure, start lower, since it is easier to raise an undercut later than to grow one back.
Rounded Back Pixie
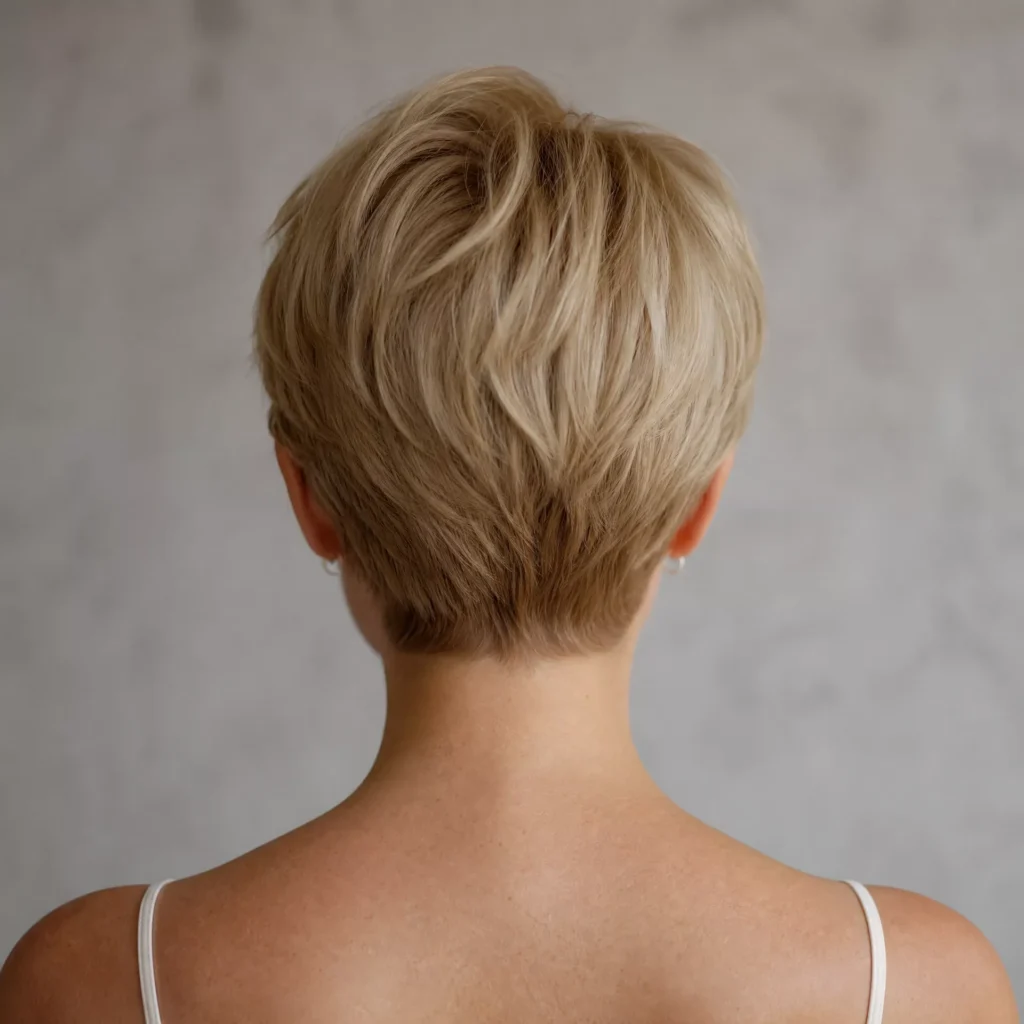
A rounded back is mostly about silhouette. Instead of a shelf or a hard neckline, the hair follows the curve of the skull from crown to nape, so the result depends heavily on your head shape. A fuller occipital area gives a naturally rounded outline, while a flatter back may need a little more length or graduation to build the curve.
With no sharp edge to lose, this shape tends to look tidy for longer between visits, though the outline gets less defined as the ends lengthen.
Stacked Back Pixie
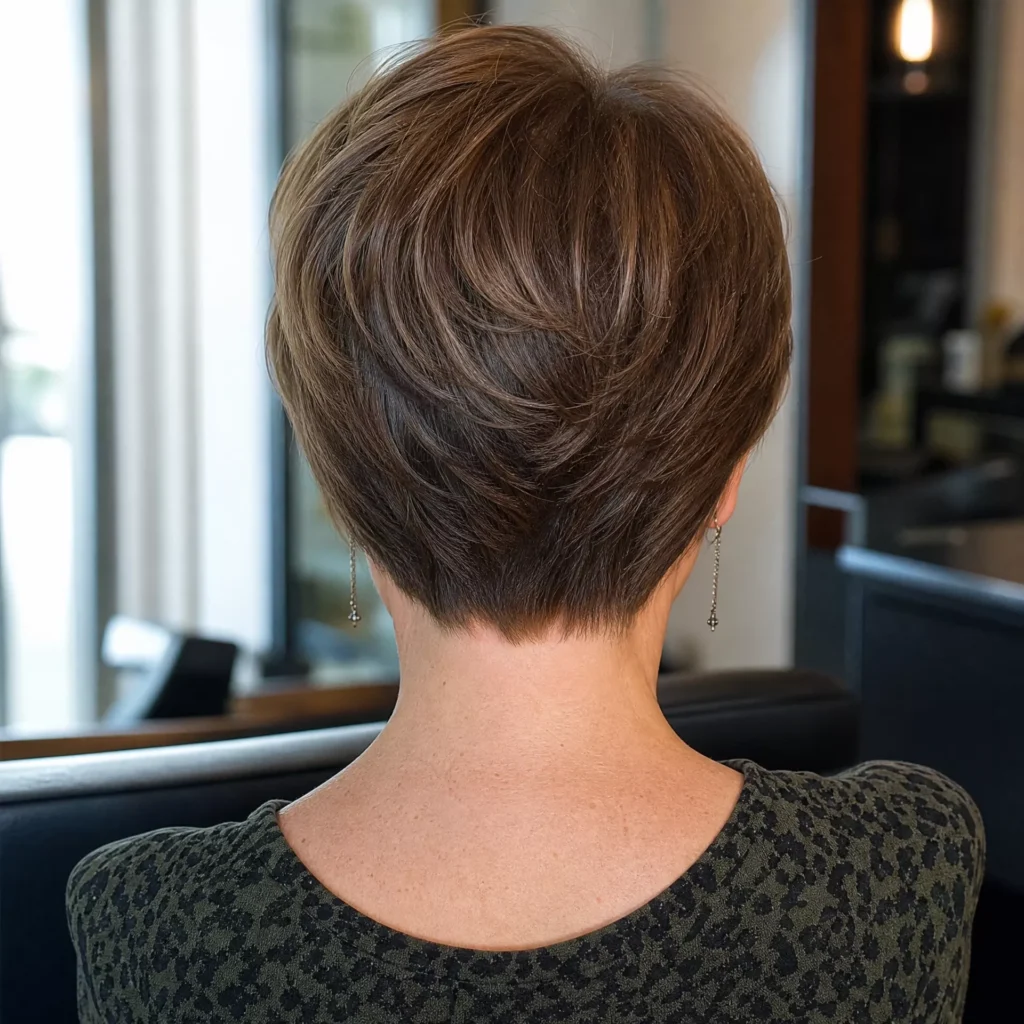
Stacking is a graduation technique. Short layers at the base of the back are built up under longer ones, pushing the hair out and up into a curved shelf through the occipital area. From behind, that reads as a fuller shape at the back of the head. It comes from how the hair is cut and does not change how much hair you have.
That is why density matters. Stacking uses length to create weight, so it needs enough hair to fill the shape. Ask where the stack will start, because a higher stack sits higher on the head and changes the side profile as well.
Textured Crown Pixie Back View
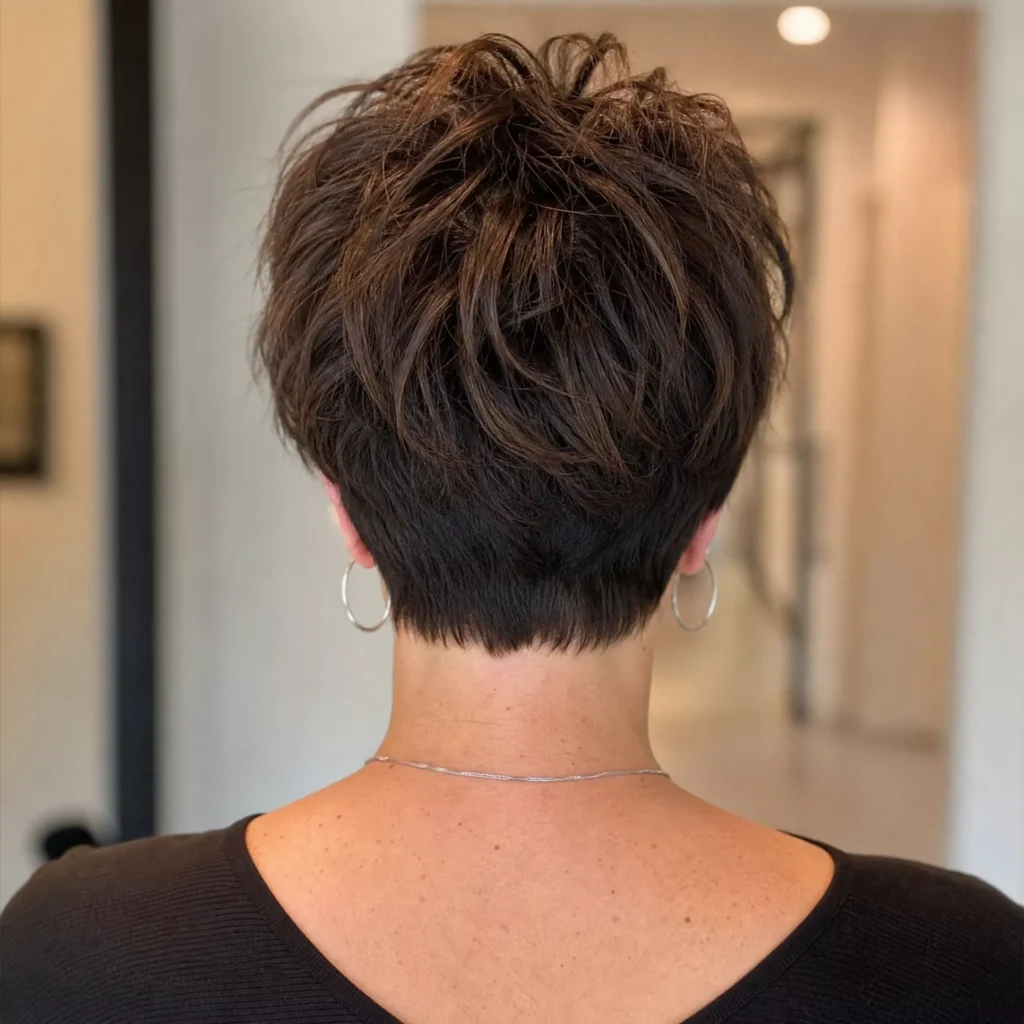
The crown is the part of the back you can rarely see yourself, and a textured crown looks quite different from behind. Instead of a smooth surface, layers are cut at varied lengths so individual pieces separate, and from the rear that shows up as visible layering with the tips pointing in slightly different directions.
The texture comes from the cut, but a small amount of paste or clay is usually what keeps the pieces from blending back together. Very fine, straight hair may need more product to hold the definition.
V-Cut Neckline Pixie
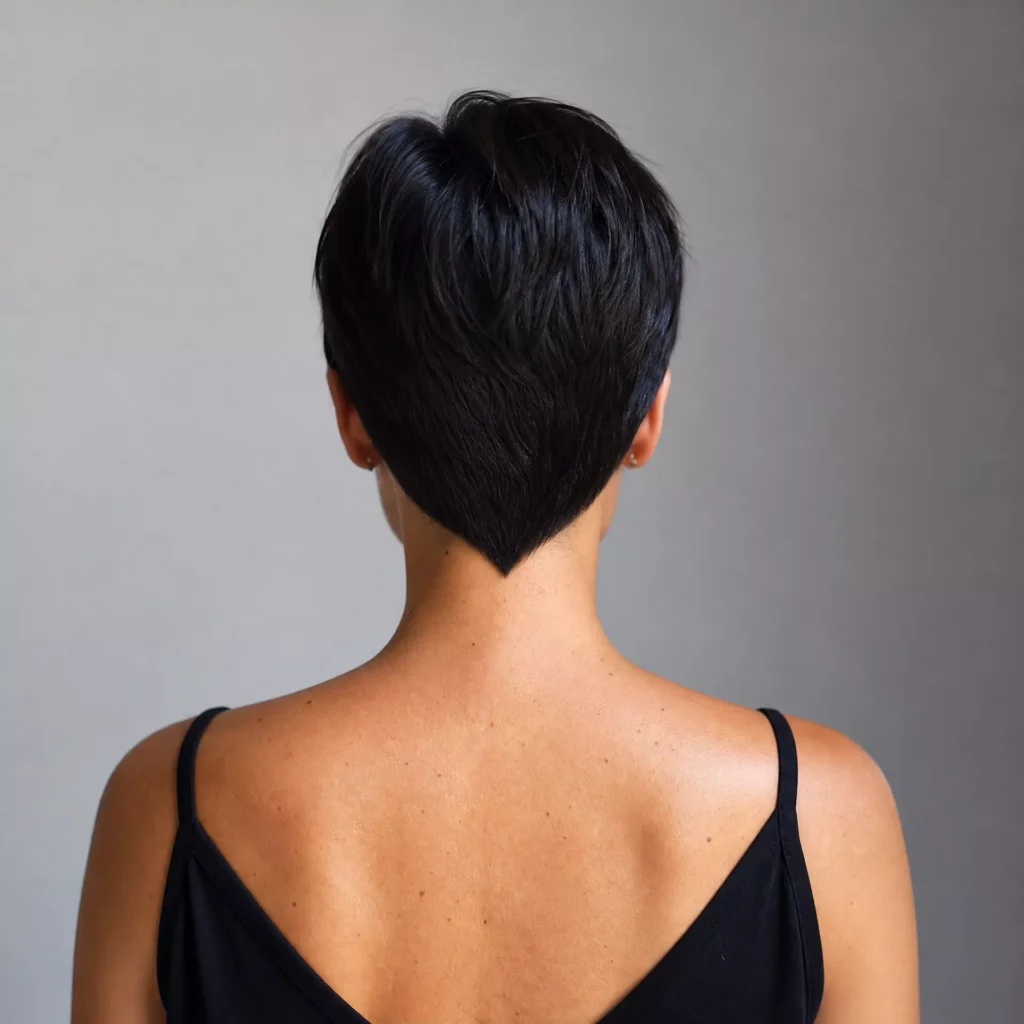
A V-cut is neckline geometry. Instead of following the hairline, the hair is cut to a point down the center of the nape, which draws attention to the vertical line of the neck.
Precision is both the point and the risk. The V has to sit exactly on the centerline, and a whorl or uneven hairline can make it look off-center. It also fuzzes quickly, because sharp edges lose definition as hair grows, so many people reshape it every three to four weeks. Ask to see how the point sits against your natural hairline before it is finished.
Soft Natural Neckline Pixie
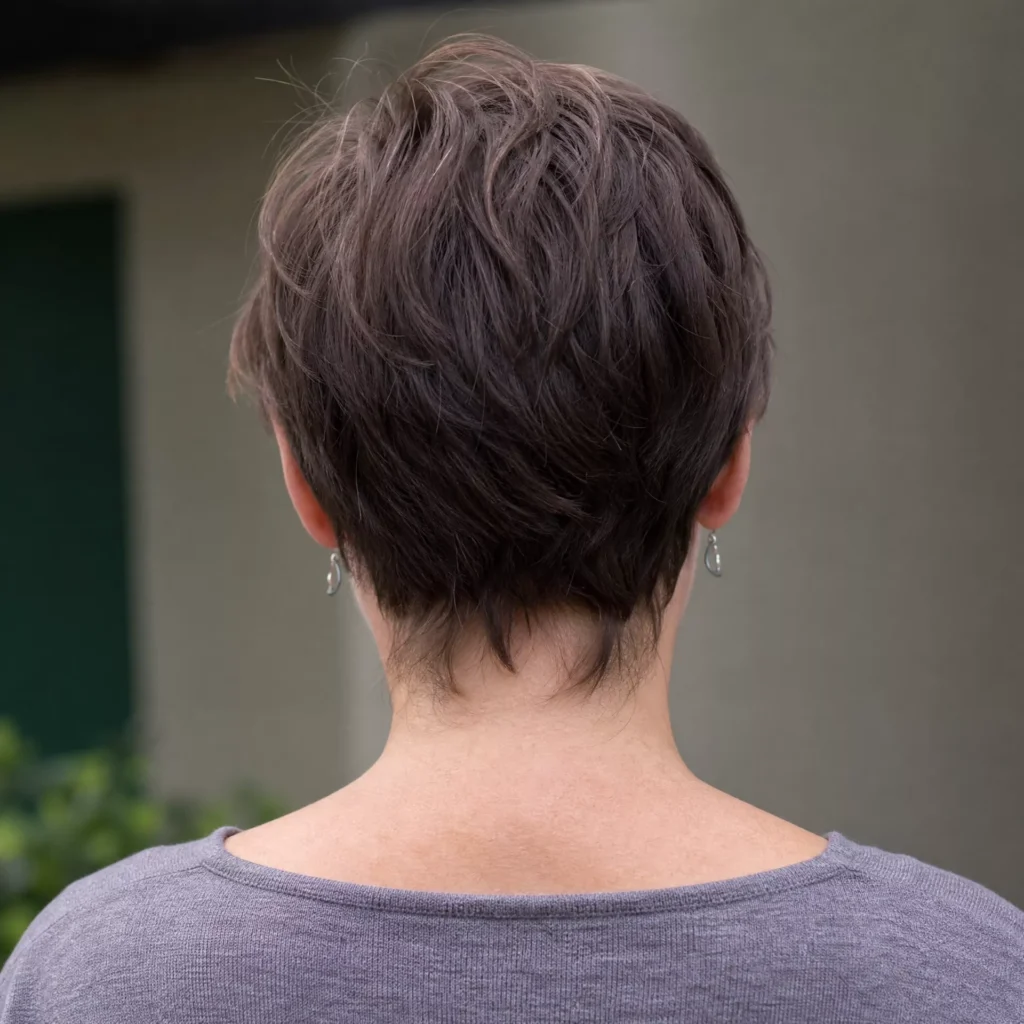
This one leaves the nape alone. The finish follows your natural hairline, including the fine hairs and any irregular growth, so the back looks softer and slightly undefined. Since there is no sharp line to lose, it usually looks tidy for longer, and trims roughly every six to eight weeks are typical.
The trade-off is precision. Hair that grows in wisps or uneven patches at the nape can look untidy rather than soft.
Disconnected Undercut Pixie Back
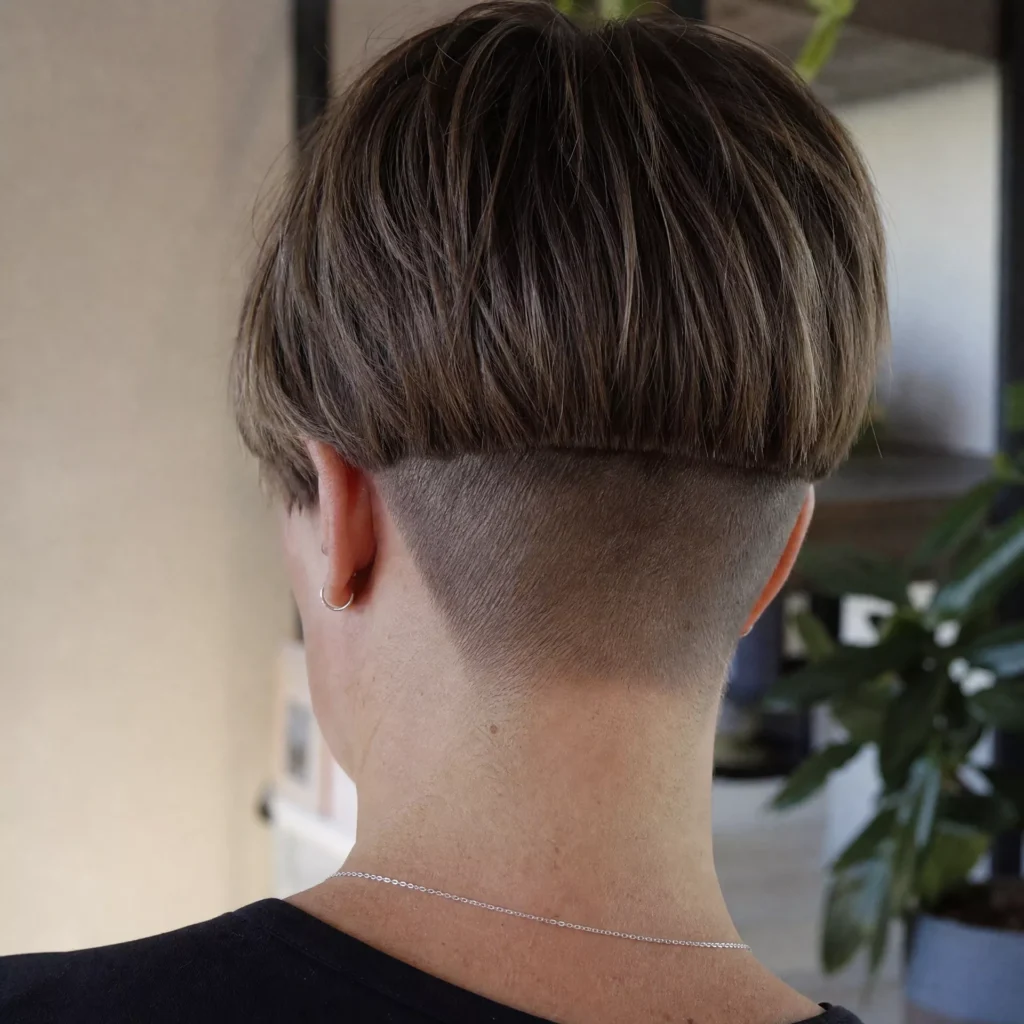
Disconnected means the two sections are not blended. The shorter layer underneath and the longer hair above meet at a visible weight line, a step instead of a gradient, and from behind that step is the main design feature. The top section can look as though it is resting on the shorter one.
The difference from a shaved undercut is the point of the cut. A shaved undercut is about how short the lower section is, and a disconnected cut is about the abrupt transition. The top needs enough length and density to cover the step cleanly, and as the lower section grows, the step softens, so the shape changes noticeably within a few weeks.
Layered Back Pixie with Crown Volume
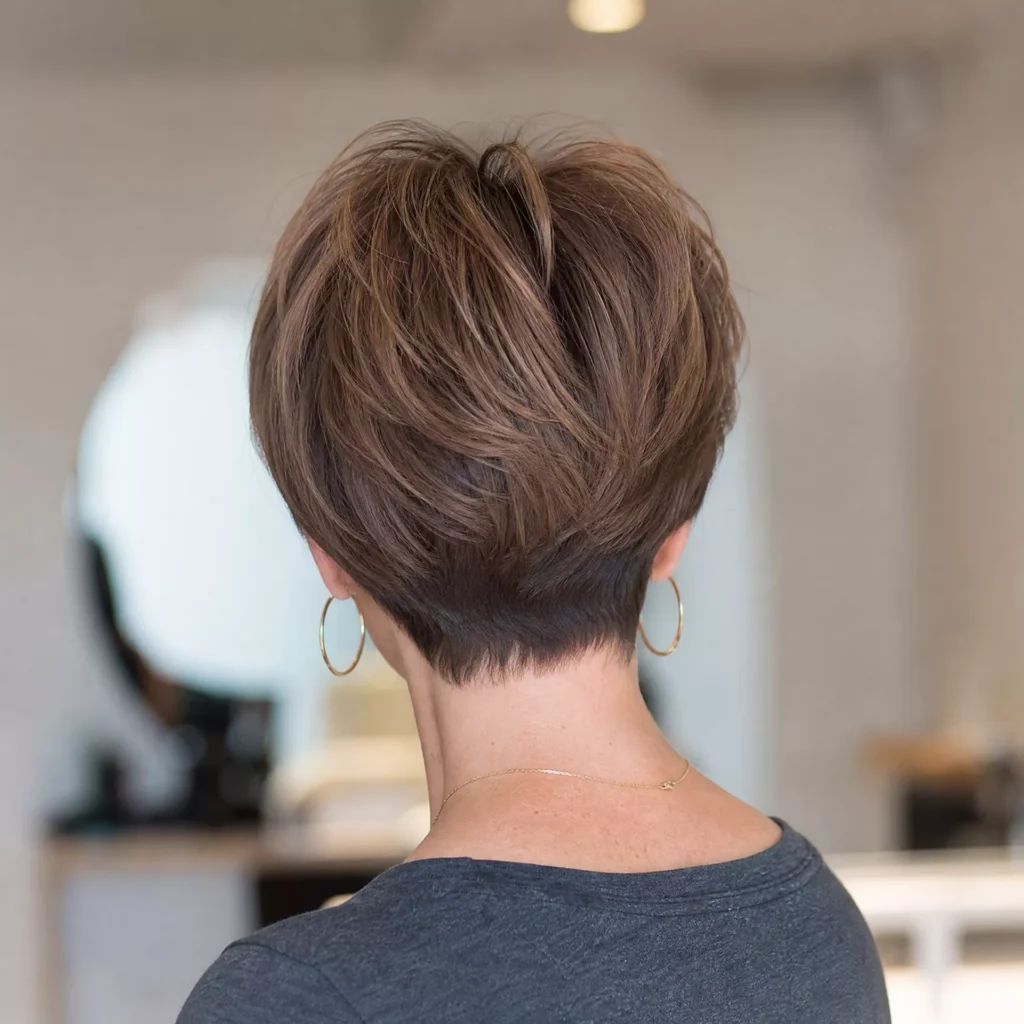
This is the layered version of a fuller back, not the stacked one, and the difference is in how the layers behave. Here they are cut to blend from the crown down toward the nape, so the back has lift at the top and softens gradually below, without the shelf that stacking creates. That also makes it easier to blend into the sides.
The fullness comes from the length and direction of the crown layers. On fine hair with reasonable density, it can create the appearance of more volume at the top. The result still depends on how your hair grows at the crown, since a cowlick there can push the layers in a different direction than the photo shows.
Straight Neckline Pixie Back View
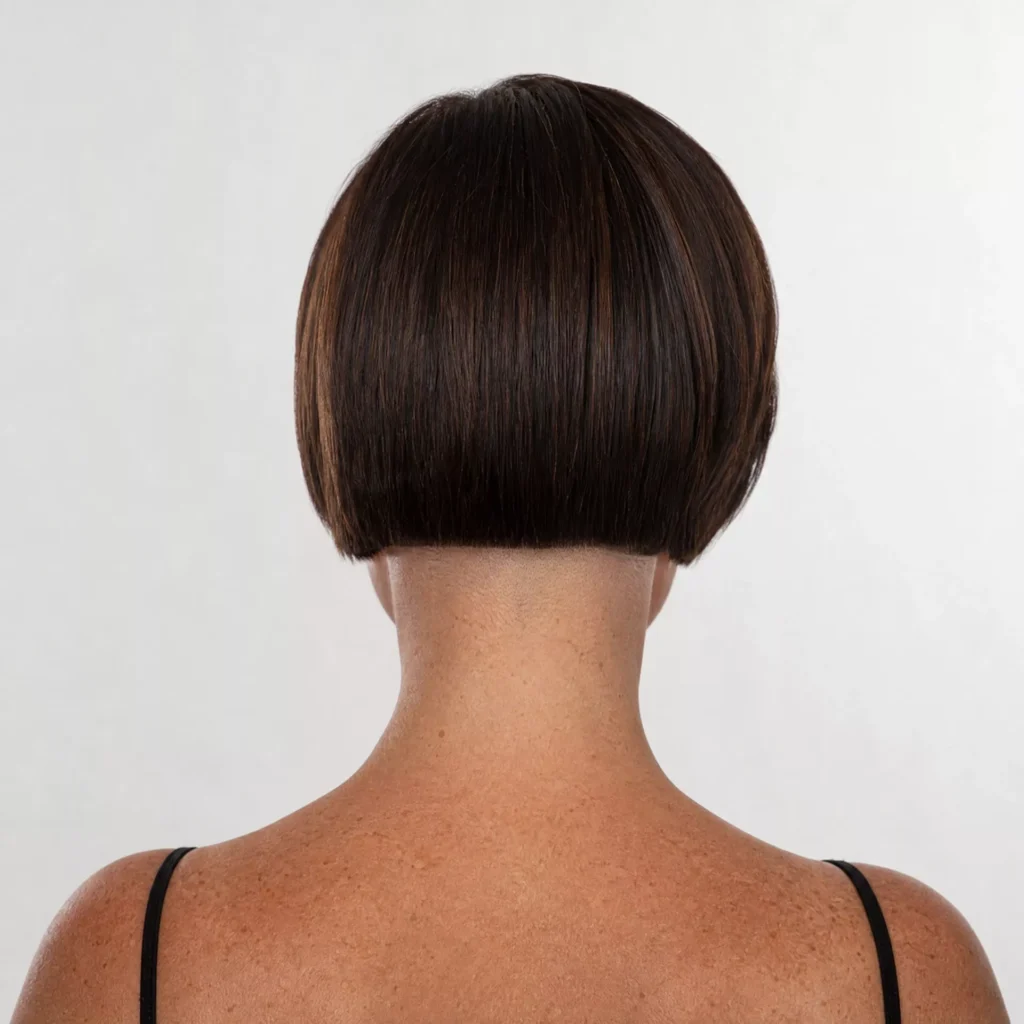
A straight neckline is cut as one horizontal line across the nape. It is a graphic finish, and it makes the shape of your hairline obvious, because a straight line across a curved or uneven hairline leaves more skin showing in some places than others. Your stylist may need to clean the edges near the ears or leave a little length to even it out.
Straight lines blur quickly, and many people re-cut the edge every three to four weeks to keep it crisp. If that sounds like too much, a softer neckline is easier to live with.
PRO TIP: Always ask your stylist to photograph the back of your pixie cut before you leave the chair. The back view is the angle that grows out fastest, especially around the neckline, and knowing exactly what it looks like helps you communicate the maintenance schedule you need. A tapered nape typically needs refreshing every four to five weeks while a softer natural neckline can wait six to eight weeks.
Faded Taper Pixie Neckline
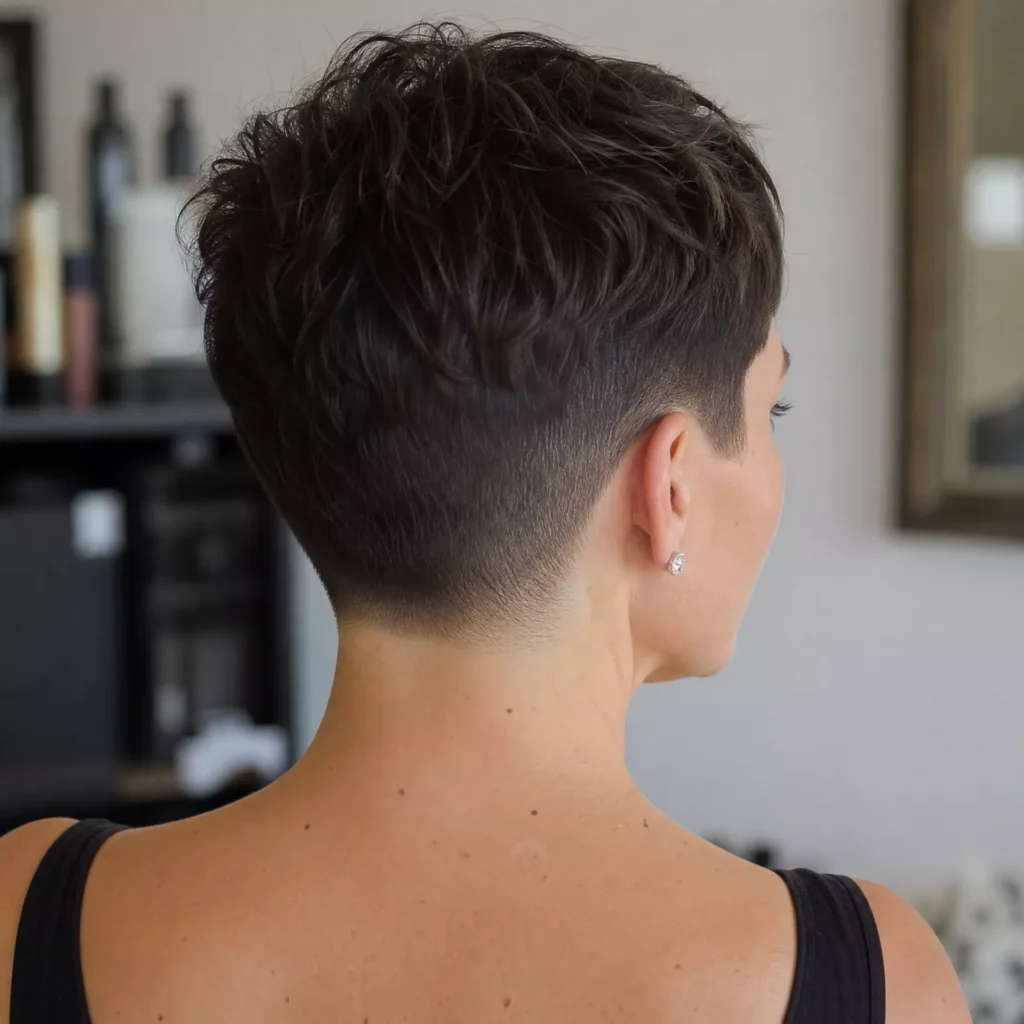
A fade is a taper that goes all the way to the skin, and two things decide how it looks: how high it rises and how quickly the length changes. A low fade stays near the neckline and behind the ears, while a higher one reaches the occipital area and shows more skin from behind.
Where the fade meets the longer hair is where skill shows. A gradual blend avoids a visible line, and a quick jump can read as a step. The shortest section can show stubble within roughly two weeks.
Pixie Back View on Curly Hair
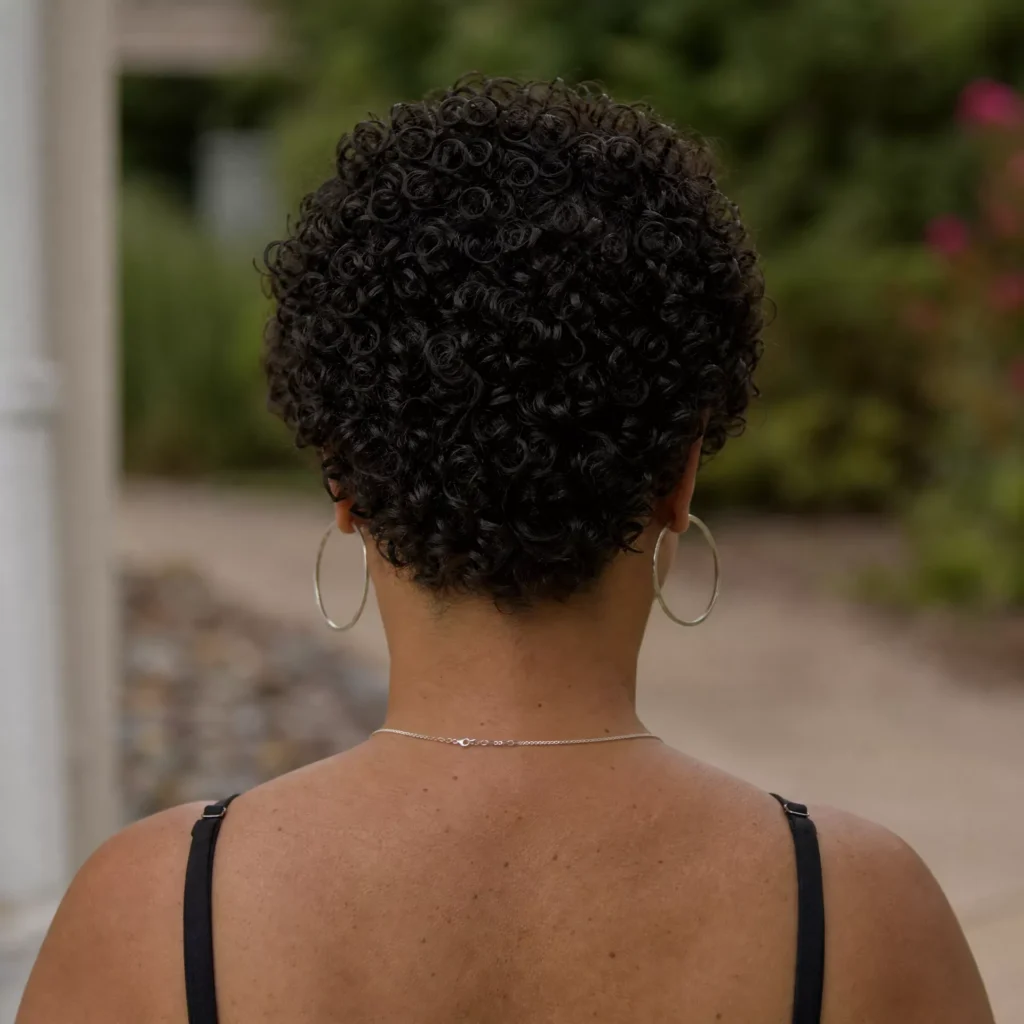
Curls dry shorter than they hang, and tighter patterns shrink more, so a nape that looks tidy when wet can sit noticeably higher once dry. That is why many curl-focused stylists check the shape on dry hair, and it is worth asking whether yours will.
Expansion is the other variable. Curls spring away from the head at the crown and nape, which adds fullness but can also widen the back if the layers are not planned for it. A taper looks softer on curls than on straight hair, since the curls blur the edge, so a very sharp neckline may lose its definition sooner. A curl cream and a diffuser tend to keep the pattern together, while brushing dry curls can expand the shape.
Elongated Nape Pixie

An elongated nape keeps extra length at the base of the neck instead of tapering it away. From behind the outline is longer and the silhouette softer, and there is no tight edge to lose, so grow-out is more forgiving.
Length brings its own quirks. Hair at the nape can flick outward against a collar or curl at the ends, so check how it behaves with your clothes, and ask whether the ends will be lightly thinned to avoid wisps.
Short Stacked Back on Fine Hair
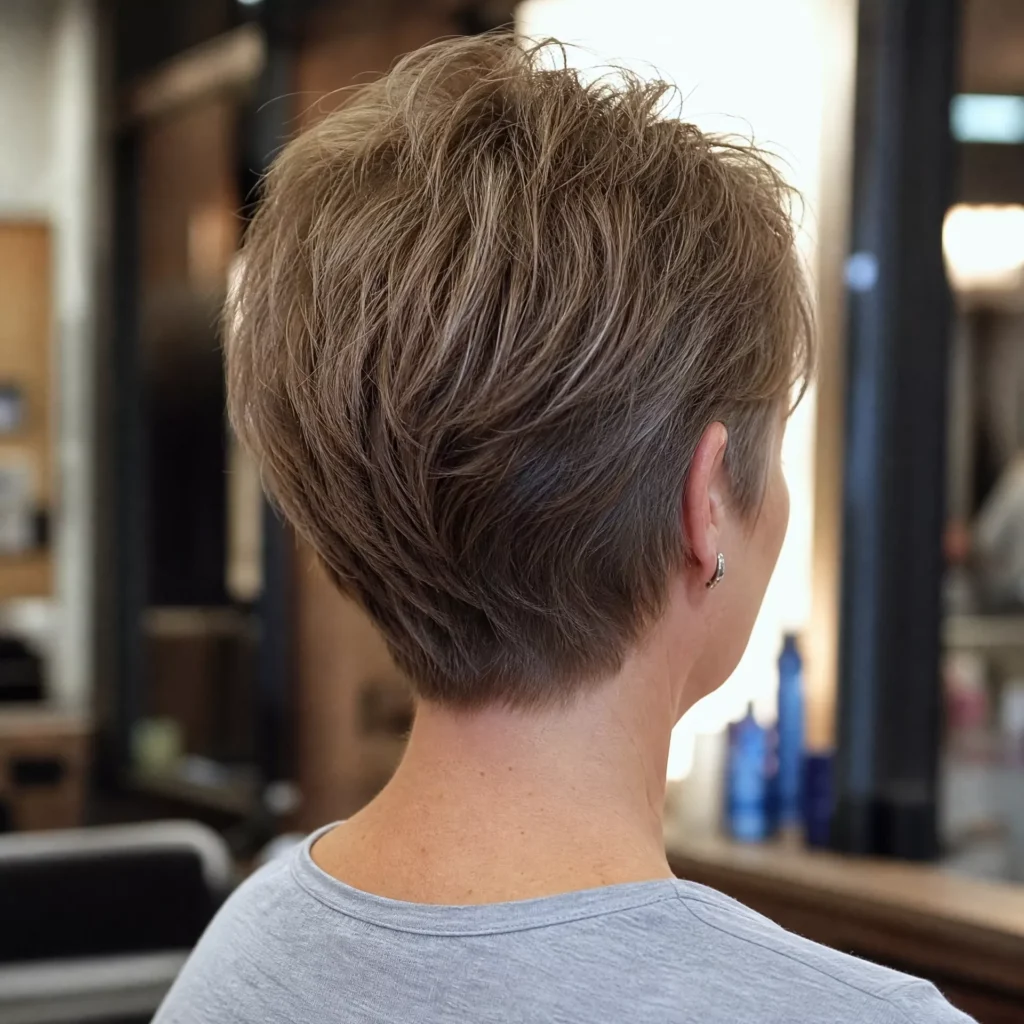
Fine and low density are not the same thing. Fine describes the width of each strand, while low density means fewer strands. Stacking uses the strands you have, so with fine hair of average density, a short stack can create the appearance of more fullness at the back. With low density, the short layers may leave the scalp more visible and the shape can look thinner.
Ask your stylist to be conservative on the first cut. You can go shorter at the next visit, but you cannot put length back. Light root-lift products work better than heavy ones at the crown.
Nape Undercut with Design Pixie
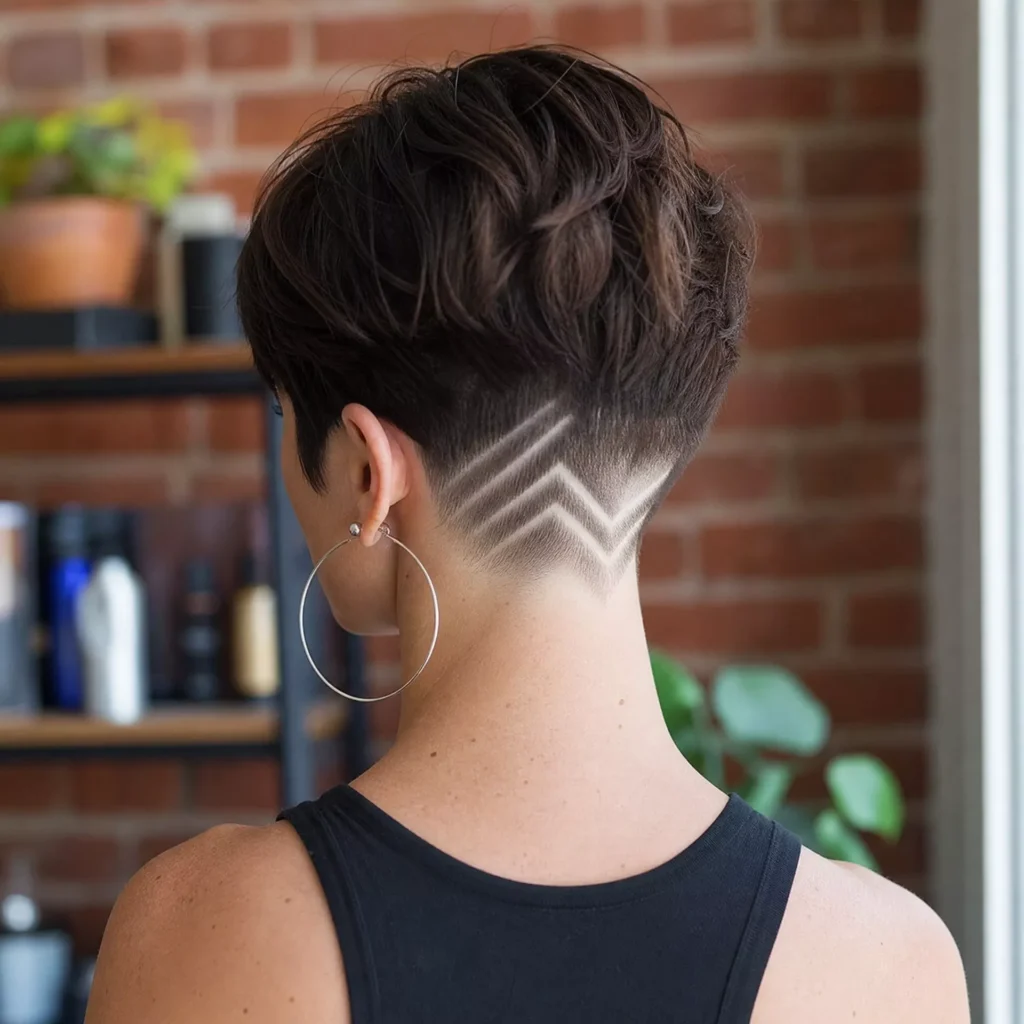
A nape undercut with an etched design is mainly a visibility question. The design usually sits under longer hair and shows only when the hair is lifted or tucked, so decide how often you want it seen.
It is also a maintenance commitment. The clipped lines soften as hair regrows, so a design often needs a touch-up every two to three weeks to stay crisp, and a simple shape holds up better than a detailed one. Ask how the design will sit against your hairline and any whorl at the nape.
Blended Taper Back View
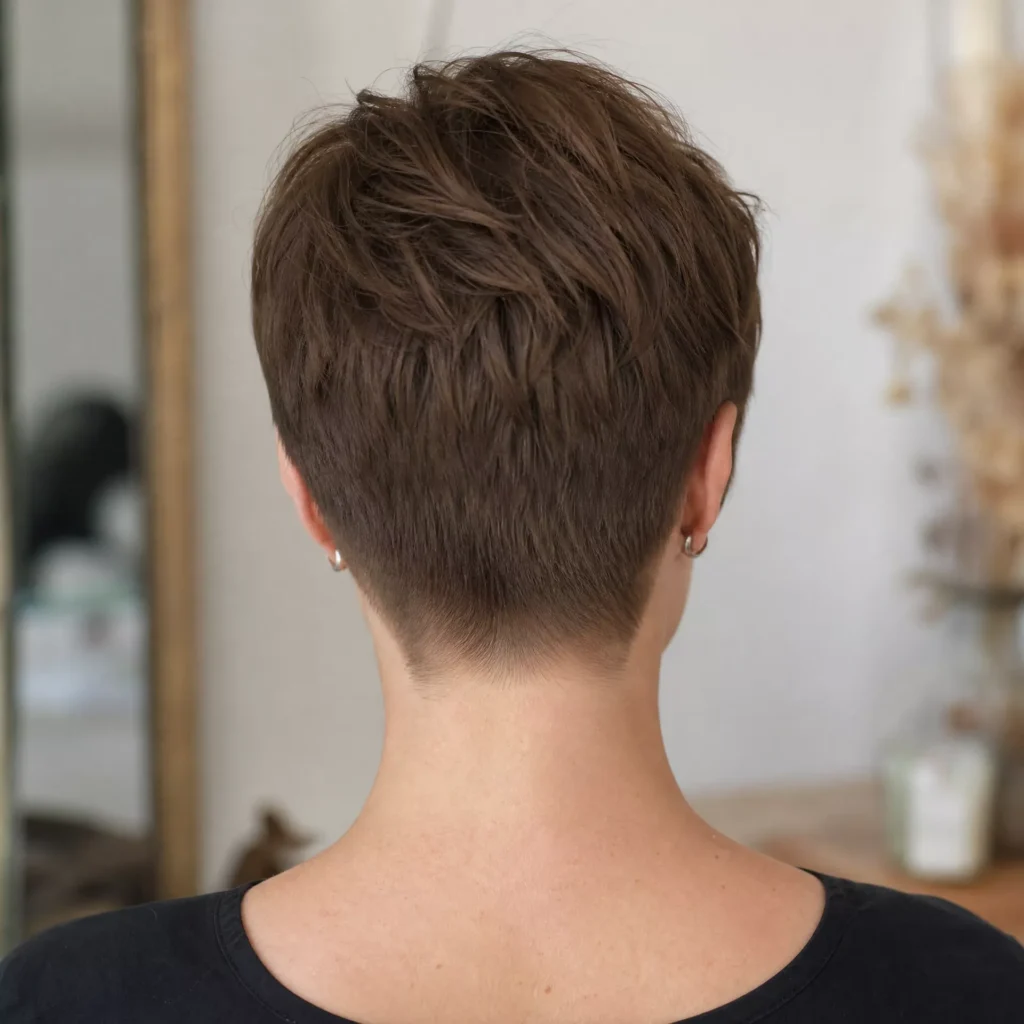
The classic taper is mostly about how the nape ends. A blended taper is about the middle of the back, meaning the transition between the longer crown and the shorter neckline. Done well, the length changes gradually and there is no visible ledge. Done poorly, a step can show around the occipital area.
Blending is usually done with clippers or scissors over comb, and it takes some skill on thick hair, where an uneven blend can bulge. As it grows, a well-blended shape tends to soften gradually and does not show a sudden line, though the neckline will still fuzz.
Pixie Back View with Visible Layers
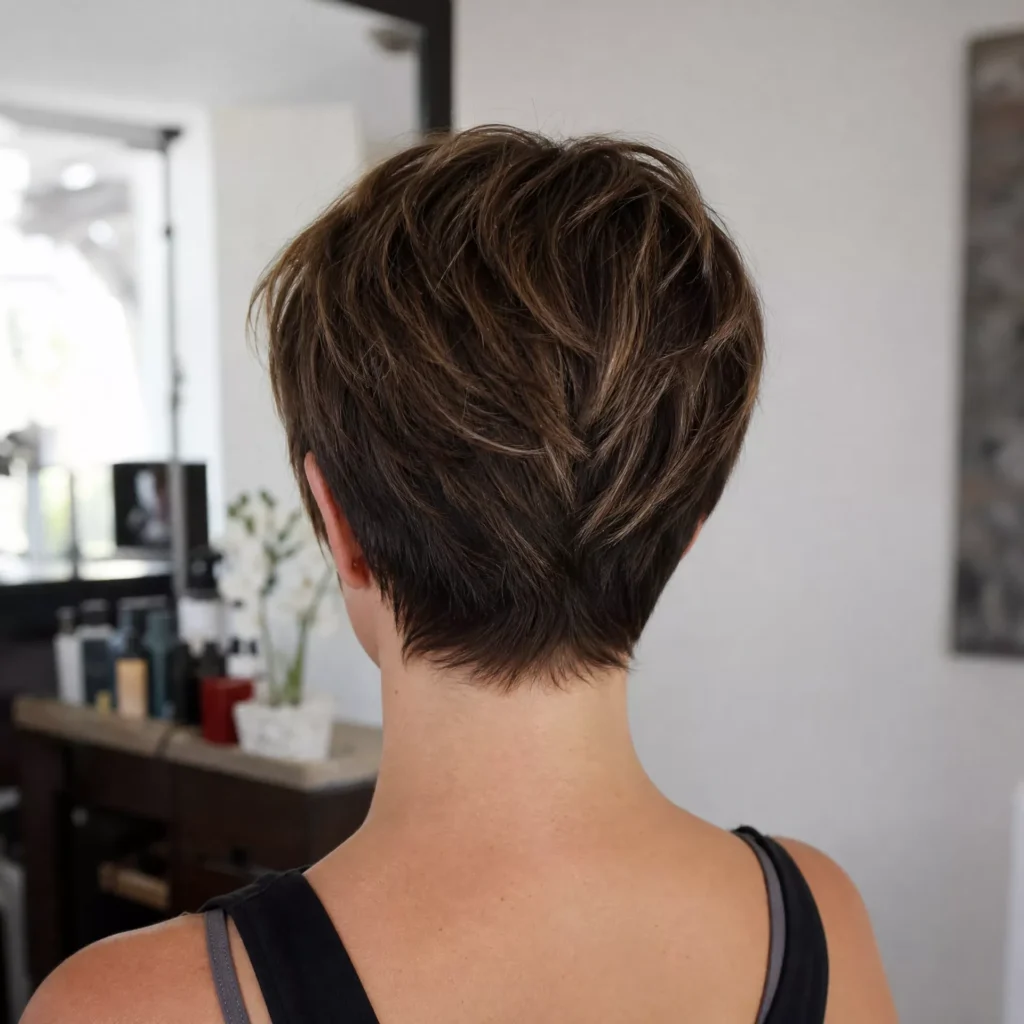
How visible layers are depends on more than the cut. Contrast in length and color, texture and styling all play a part. On wavy or textured hair, layers separate easily, and on very straight, fine hair they can blend into a smooth back.
Photographs often show the layers after styling with product or a blow-dry. Ask what the back looks like air-dried, and which direction the hair will be dried to keep the layers visible.
Long Back Pixie
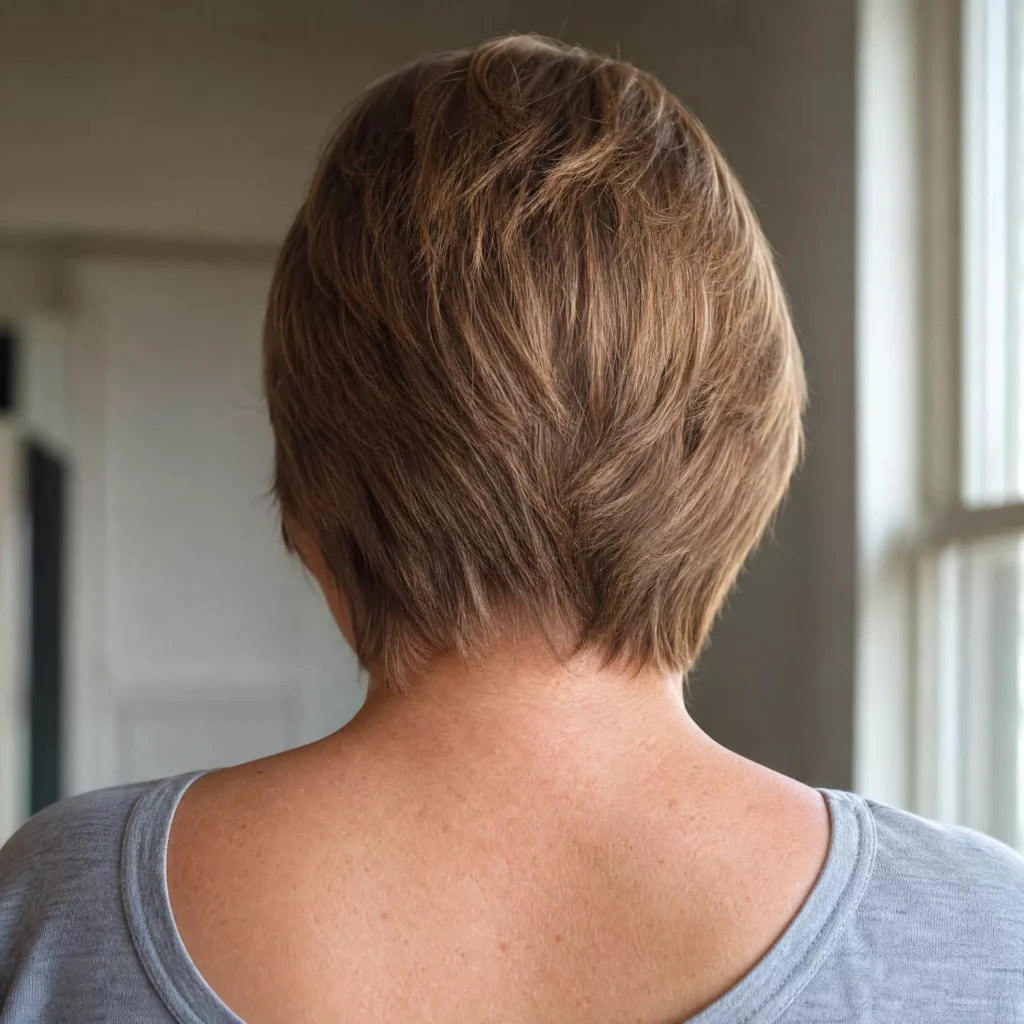
Keeping more length through the lower back and nape makes this a transitional length, and it can be a gentler step if you are new to short hair, since you can go shorter at the next visit. It sits longer on the neck, so the outline is softer.
The risk is drift. As it lengthens, the shape can move toward a shaggier or mullet-like outline, so trims every five to six weeks help keep it intentional. If you like a fuller back, ask how the length will be balanced with the sides.
Pixie Back View on Gray Hair
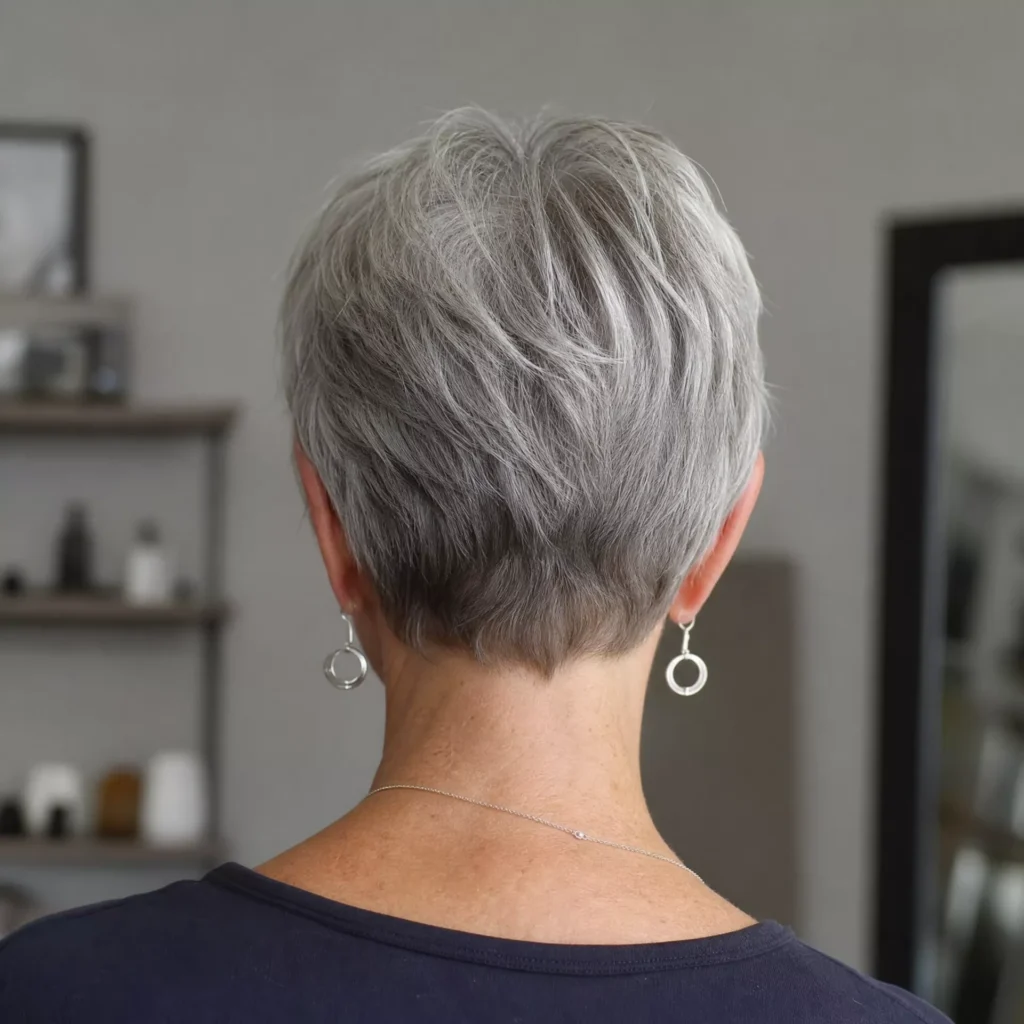
Gray hair often has a different texture from pigmented hair. It can feel coarser or wirier, which changes how the back sits: crown hairs may stand up, and the nape can look uneven if it is cut too close.
Silver and white strands also catch light differently from darker ones, so shine and finish matter. A smooth, healthy finish reads differently from a dry one, and a small amount of cream can help. If your hair is a mix of gray and darker strands, layers can show that mix as dimension.
Choppy Textured Pixie Back
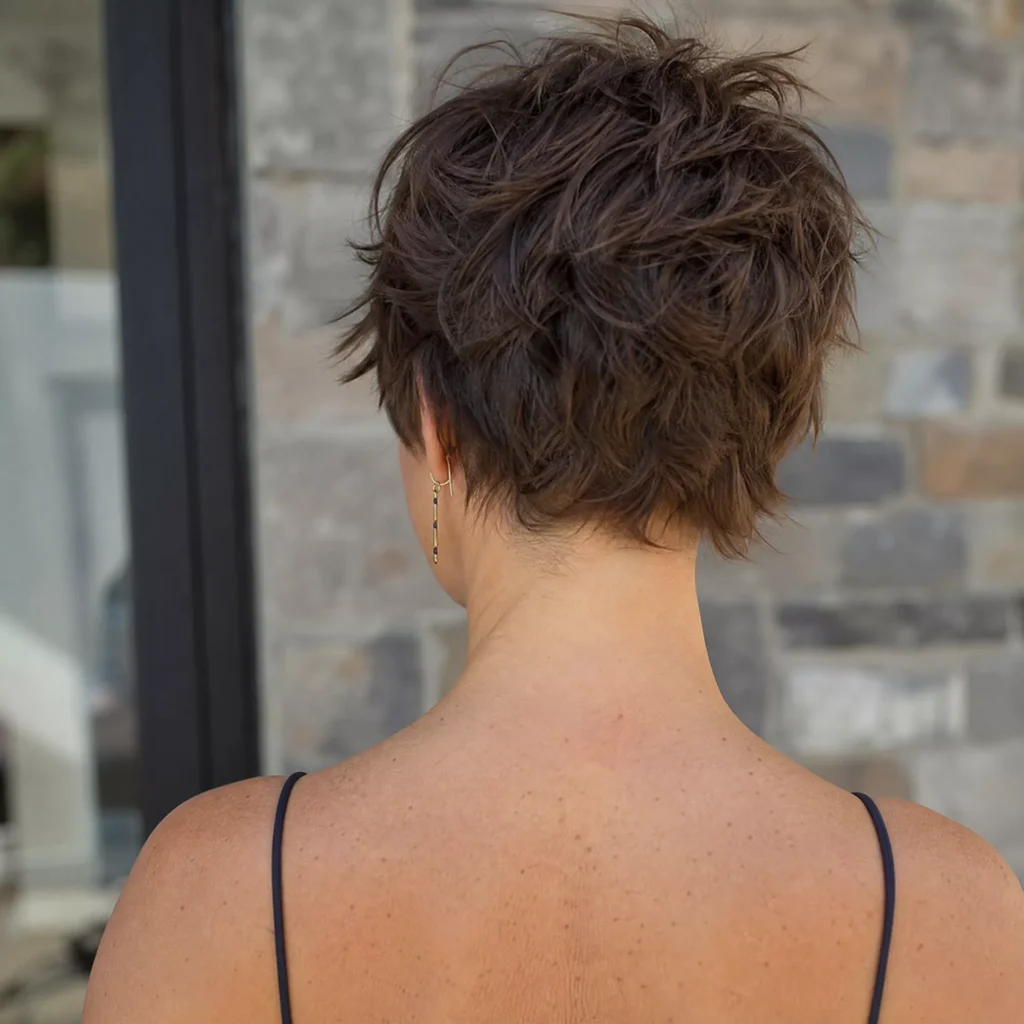
A choppy back is cut in uneven pieces, and its success depends on density. The gaps between the pieces are part of the design, and they look intentional when there is enough hair to fill them. With low density, the same gaps can look uneven.
The pieces tend to separate more with a little paste or wax. Grow-out is fairly relaxed since the outline is already irregular, though the shape can turn shaggy after six weeks or so.
Tight Taper Fade Pixie Neckline
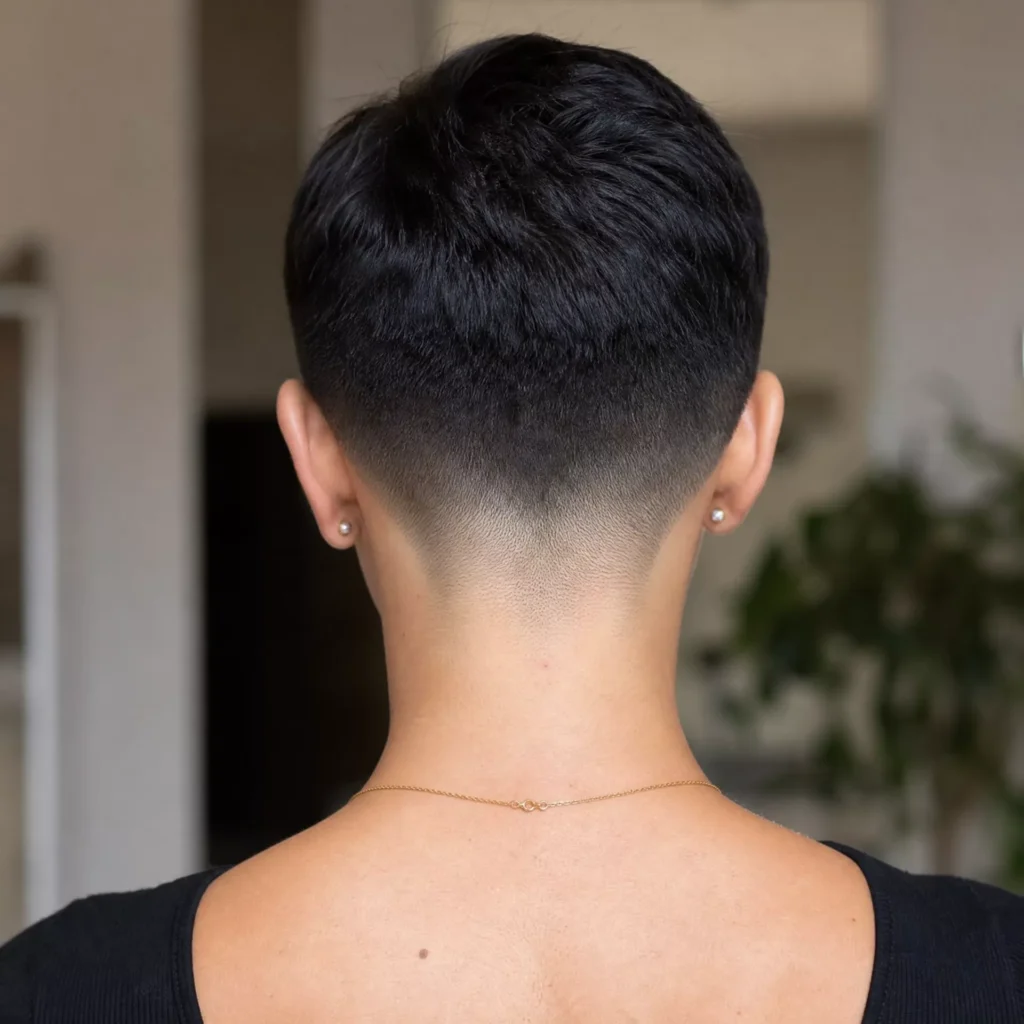
This is the shortest neckline option here, and it is about precision. The hair is taken very close to the skin at the nape and graduated upward, so the finish is sharp and any irregularity in the hairline shows. It needs clipper work, and the neckline can lose its crispness within two to three weeks.
The skin at the nape is also more exposed, so think about sun protection. Ask how tight the stylist plans to go, since a tight taper is easier to keep than to take back.
Pixie with Flipped Crown Back View
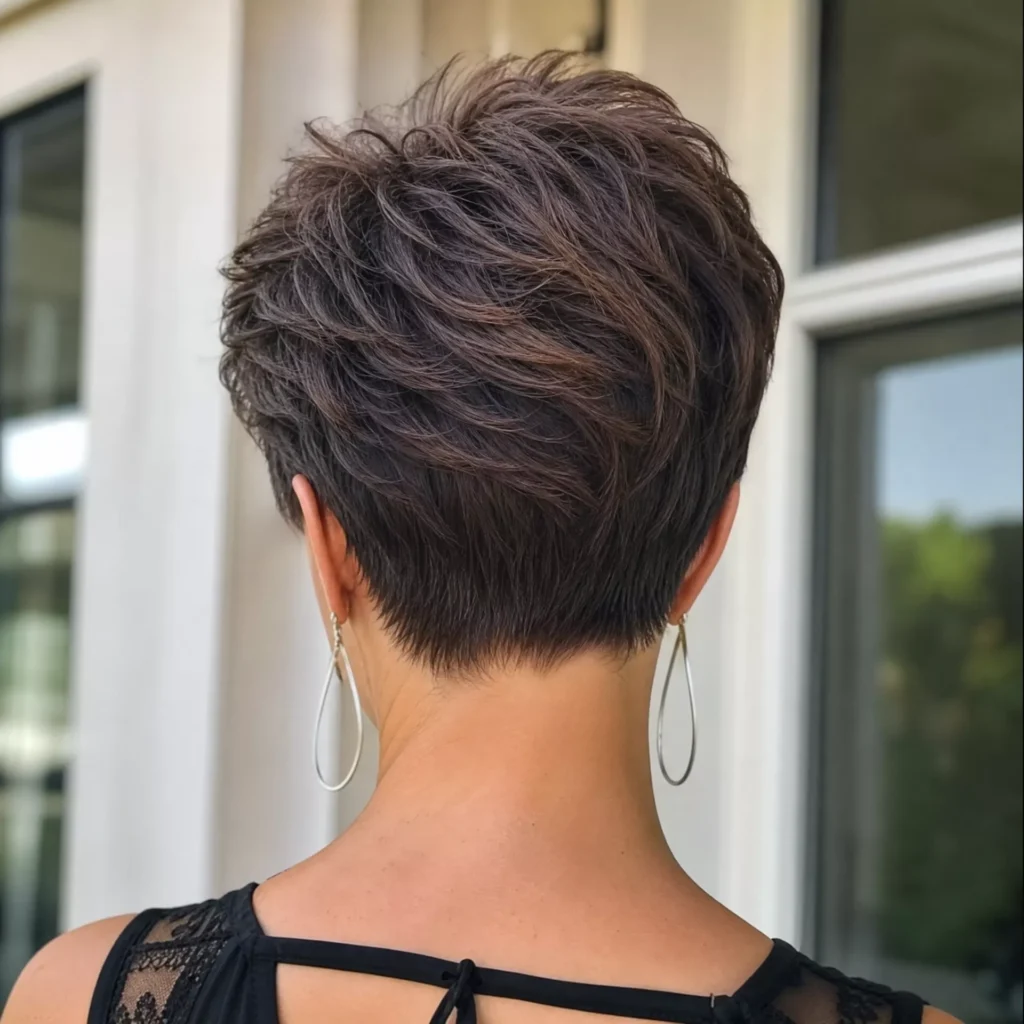
The flip is a styling finish, not a separate haircut. It comes from blow-drying or product lifting the crown hair upward or slightly forward, and it needs enough length at the crown to hold the direction.
A cowlick can help or work against you, and the lift may relax by evening. A stylist can cut the crown to make the flip easier, but the effect still depends on daily styling.
Full-Picture Layered Pixie Back
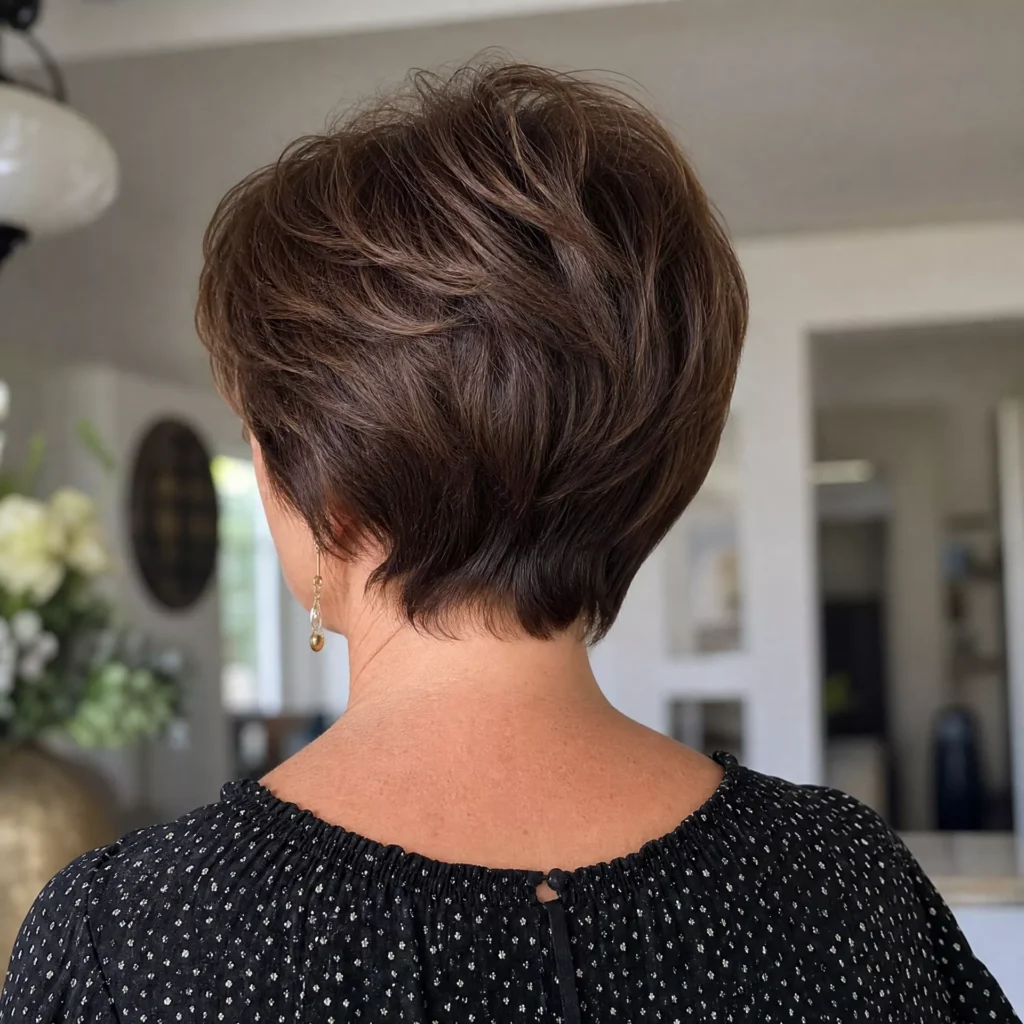
This shape combines several elements: layers through the crown, a tapered nape, visible texture through the mid-section and a blend from top to bottom. The useful question is how they connect, since each zone grows at its own pace. The crown lengthens, the taper fuzzes, and the blend softens.
Because there are several parts to maintain, expect trims roughly every four to six weeks. Ask how the transitions will be blended, so the crown and nape read as one shape.
Which Pixie Back Shape Fits What You Want?
Use this as a starting point, not a rule.
| If you want | Shapes to explore |
|---|---|
| A clean, classic finish | Classic tapered nape, blended taper |
| More crown fullness | Stacked back, layered back with crown volume (the fullness is appearance, not extra density) |
| A very short neckline | Tight taper fade, faded taper |
| A softer grow-out | Soft natural neckline, elongated nape, long back |
| A graphic shape | V-cut neckline, straight neckline |
| More contrast | Shaved undercut, disconnected undercut, nape undercut with design |
| Fine hair | Layered back with crown volume, short stacked back (kept conservative) |
| Curly hair | Pixie back view on curly hair, planned around shrinkage |
| Styling flexibility at the top | Textured crown, flipped crown |
| Fewer salon visits | Soft natural neckline, elongated nape, long back |
When a Pixie Back View Doesn’t Work as Expected
A back view can look excellent in a photo and still be a poor match for your hair or routine. The common problems are practical.
- Too much graduation on fine hair. Short layers can look sparse and leave the scalp more visible.
- Excess width at the back. Curls or thick hair can widen the shape if the layers are not planned for it.
- A neckline that grows out quickly. Sharp edges such as V-cuts, straight lines and fades lose definition within a few weeks.
- An undercut needing more upkeep than expected. Shaved sections usually need touch-ups every few weeks.
- A cowlick changing the shape. Crown or nape whorls can push hair in a different direction than the reference.
- Stacking in the wrong place. A stack that starts too high or too low can change the silhouette.
- Copying a photo without considering density and texture. Photos are often freshly cut and styled, so the same cut can behave differently on your hair.
What to Ask Your Stylist
Bring a back-view photo along with the front view you like, and point to what you want: the neckline, the taper, the crown or the texture. A few questions worth asking:
- How will you shape the nape around my natural hairline?
- Where will the graduation begin?
- Will the crown be stacked or kept flatter?
- How will this neckline look as it grows?
- Does my cowlick affect this back shape?
- How often will this need trimming?
- Can you show me the back with a mirror before I leave, or take a photo of it?
If you want a starting line: “I’d like the back to follow my natural hairline and keep some weight through the crown, without going too short at the nape.”
The Bottom Line
The back view is part of the haircut, not an afterthought. It decides how the nape sits, how the neckline grows and how the crown looks, and you will see it less than anyone else does.
Save both front and back references, and when you talk to your stylist, discuss the nape, neckline, graduation, crown and how often you are willing to come in. Choose the shape that fits your own hair, density and routine, not only the photograph.