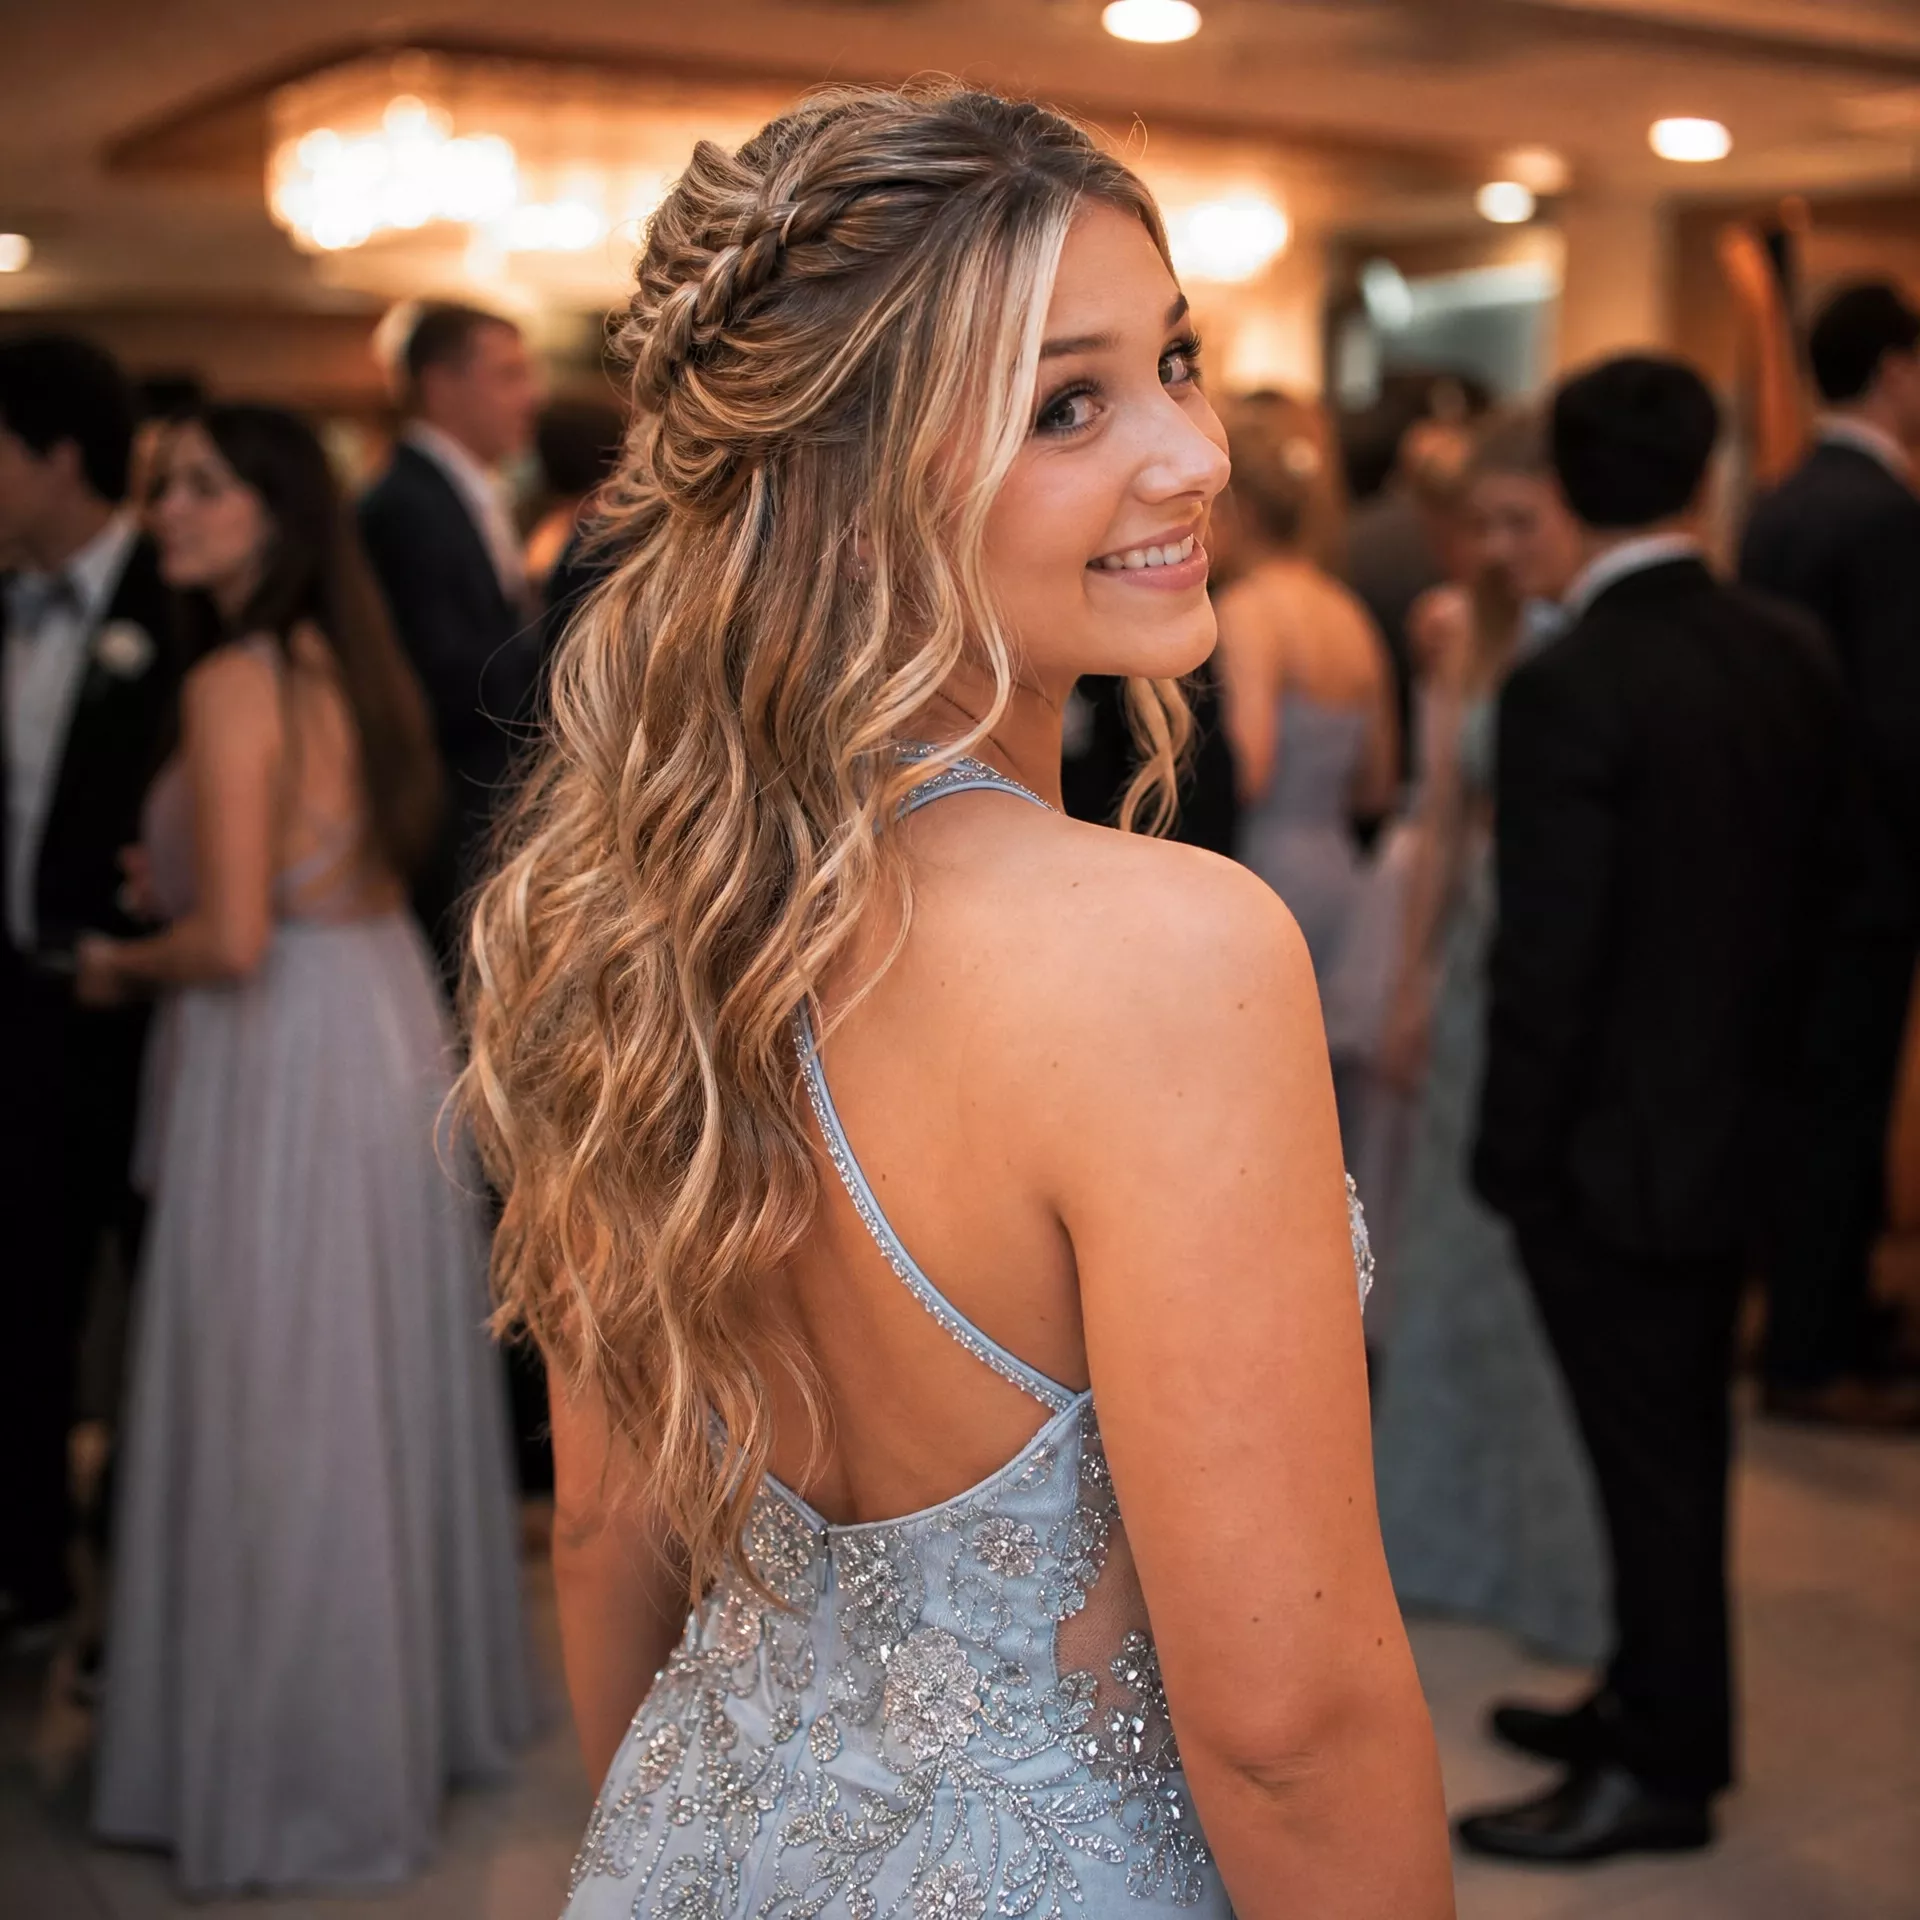
25 Easy Homecoming Hairstyles You Can Recreate at Home
Choosing a homecoming hairstyle involves more than finding a photo you like. The style has to suit your hair’s length and texture, match what you can realistically do with your own hands and tools, work with your outfit, and stay comfortable through photos, dinner, and dancing. An “easy” style isn’t easy in the same way for everyone. A low bun that takes one person three minutes might take fifteen on very long, dense hair, and a fishtail braid that looks simple in a photo can take a few practice runs before it comes out even. This guide covers 25 easy homecoming hairstyles with what each one looks like, the tools involved, step-by-step instructions, a realistic time range, and what to do if it doesn’t come out right the first time. After the list, you’ll find help with choosing by hair length and texture, matching your outfit, preparing, and making your style last.
Simple Low Bun with Face Pieces
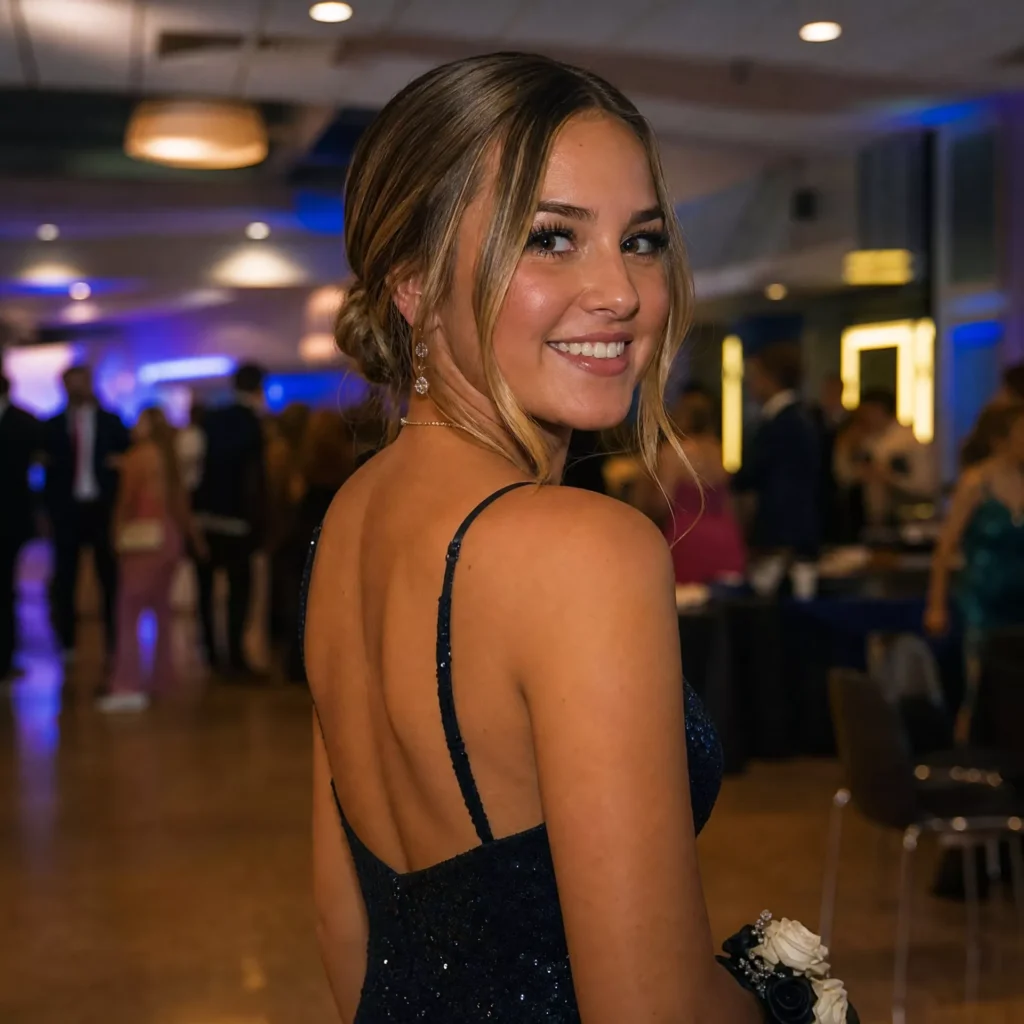
Simple Low Bun with Face Pieces
A neat bun at the nape, with two loose pieces at the front to soften it. It works on shoulder-length hair and longer, though shorter hair may only make a small bun. Straight, wavy, and curly hair all work, but slippery hair may need an extra pin or two.
You’ll need: an elastic, 4 to 6 bobby pins, a brush or wide-tooth comb, and texture spray if your hair is very smooth.
- Brush or finger-comb your hair back and gather it at the nape.
- Secure it with an elastic.
- Twist the ponytail loosely and wrap it around the base.
- Pin around the edge of the bun at several points, pushing each pin through the bun and into the hair underneath.
- Pull a thin piece loose at each temple, then curl it or leave it straight.
- Shake your head gently to check that the bun feels secure.
Time and difficulty: about 5 to 10 minutes once practiced. Beginner.
If it goes wrong: if the bun feels loose, add pins at different angles instead of pushing one pin in harder. If the face pieces look stringy, take slightly thicker sections or give them a quick curl.
Half-Up with Volume
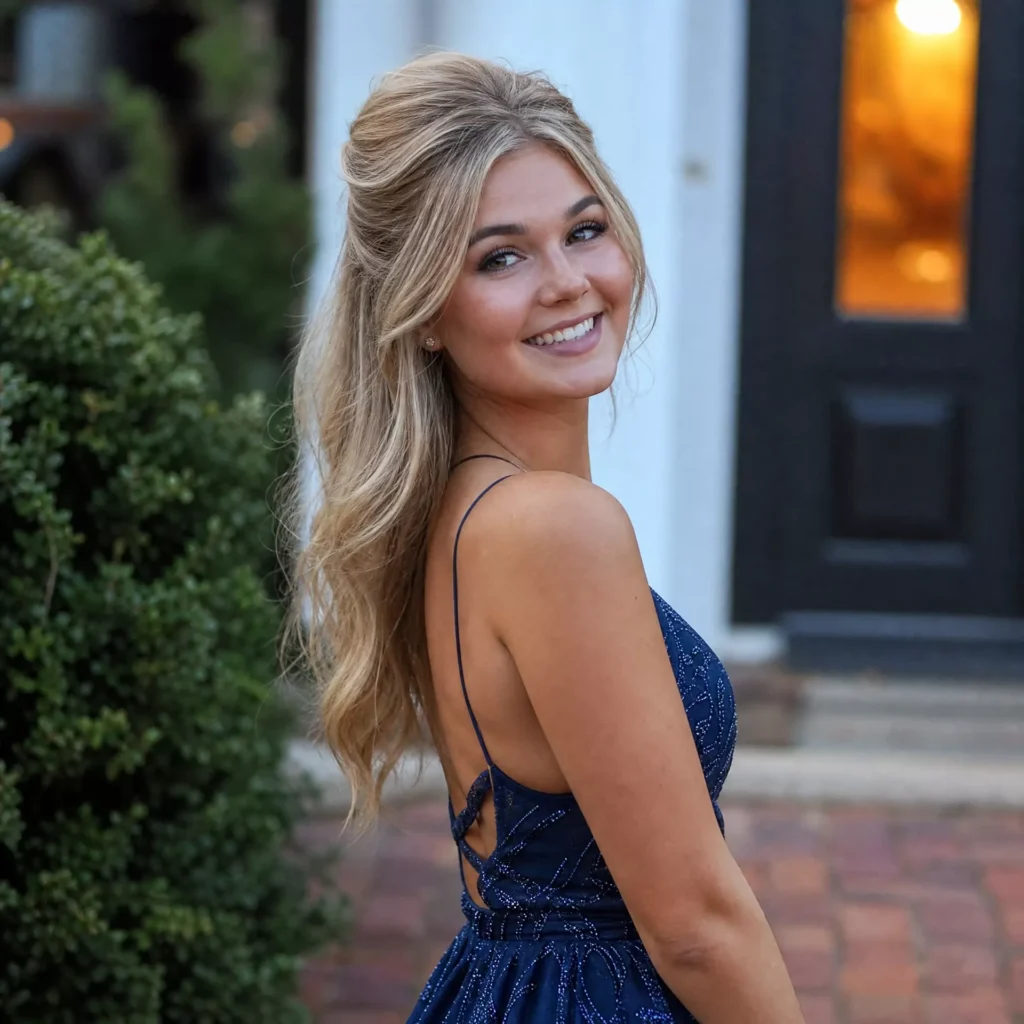
The top section is lifted at the crown and secured at the back, while the rest of the hair stays down. The crown lift makes it look more finished than a flat half-up. Medium to long hair works best, and a longer bob can manage a smaller version. Fine hair benefits most from the lift, while thick hair may need very little.
You’ll need: a fine-tooth comb, a clear elastic or small clip, and a light hairspray if you like.
- Section the hair from the top of each ear up to the crown.
- Hold the crown section straight up and gently backcomb a few small sections near the roots, pushing the comb toward the scalp.
- Lightly smooth the top layer over the teased area so the backcombing doesn’t show.
- Gather the section at the back of your head.
- Before tightening the elastic, push the section slightly forward to keep the lift, then secure it.
Time and difficulty: about 5 to 10 minutes. Beginner.
The detail that matters: backcomb only near the roots and only a few sections. Heavy teasing tangles easily and is harder to brush out later. If the crown looks flat, loosen the elastic slightly and nudge the section forward again.
Sleek High Pony for Homecoming
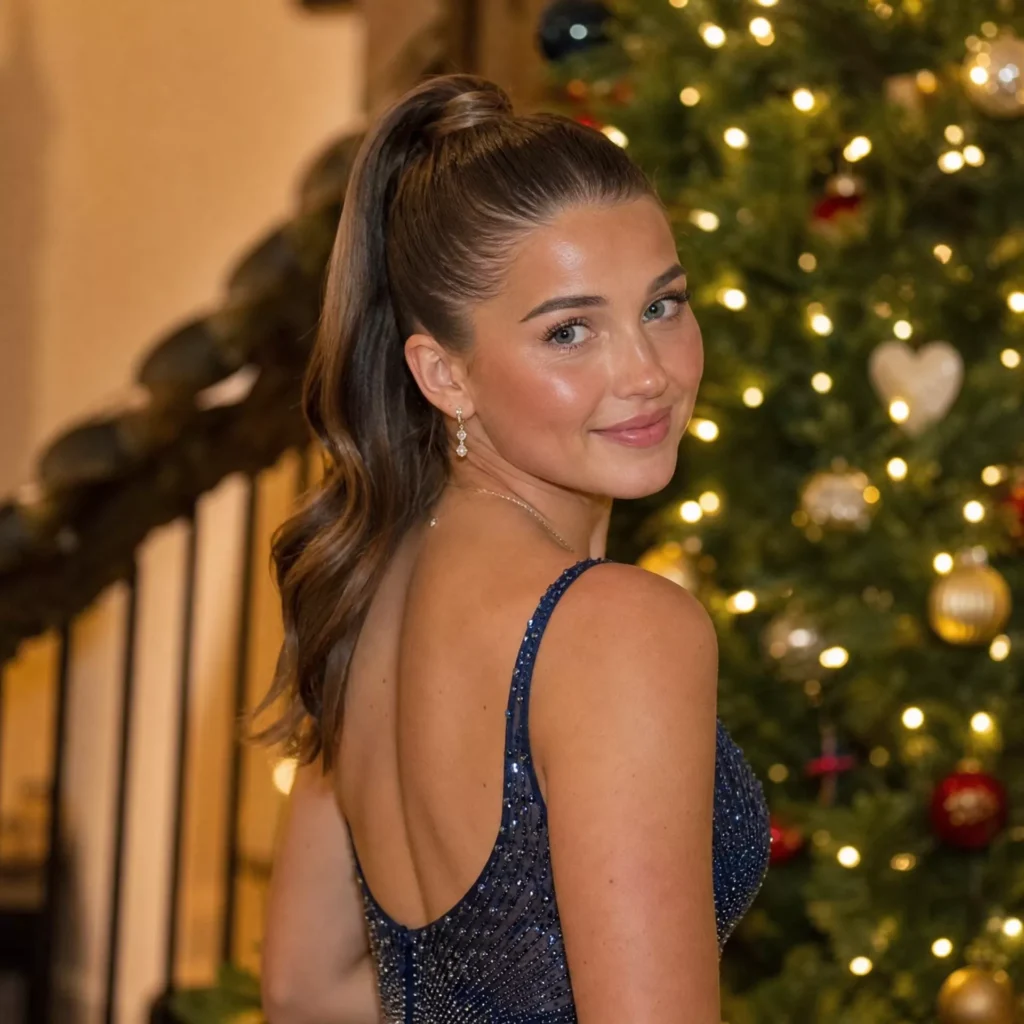
A smooth ponytail at the crown, with a strand wrapped around the elastic to hide it. It keeps hair off your face and neck. It suits medium to long hair, though very long or dense hair can feel heavy at this height. A sleek finish comes easiest on straight hair, while wavy or curly hair may need a blow-dry first.
You’ll need: a brush, a strong elastic, smoothing cream or gel, a bobby pin, and a light finishing spray if you like.
- Work a small amount of smoothing cream through dry hair.
- Tilt your head back slightly and brush the hair up toward the crown, one side at a time.
- Secure the ponytail with an elastic.
- Take a thin strand from underneath the ponytail, wrap it around the elastic, and pin the end underneath.
- Smooth any flyaways with a little more product on your fingertips.
Time and difficulty: about 5 to 15 minutes, longer if you blow-dry first. Beginner.
If it goes wrong: bumps usually come from gathering too much hair at once, so brush each side toward the ponytail separately. If the ponytail gives you a headache, lower it slightly. A secure ponytail shouldn’t hurt.
Loose Curls Down for Homecoming
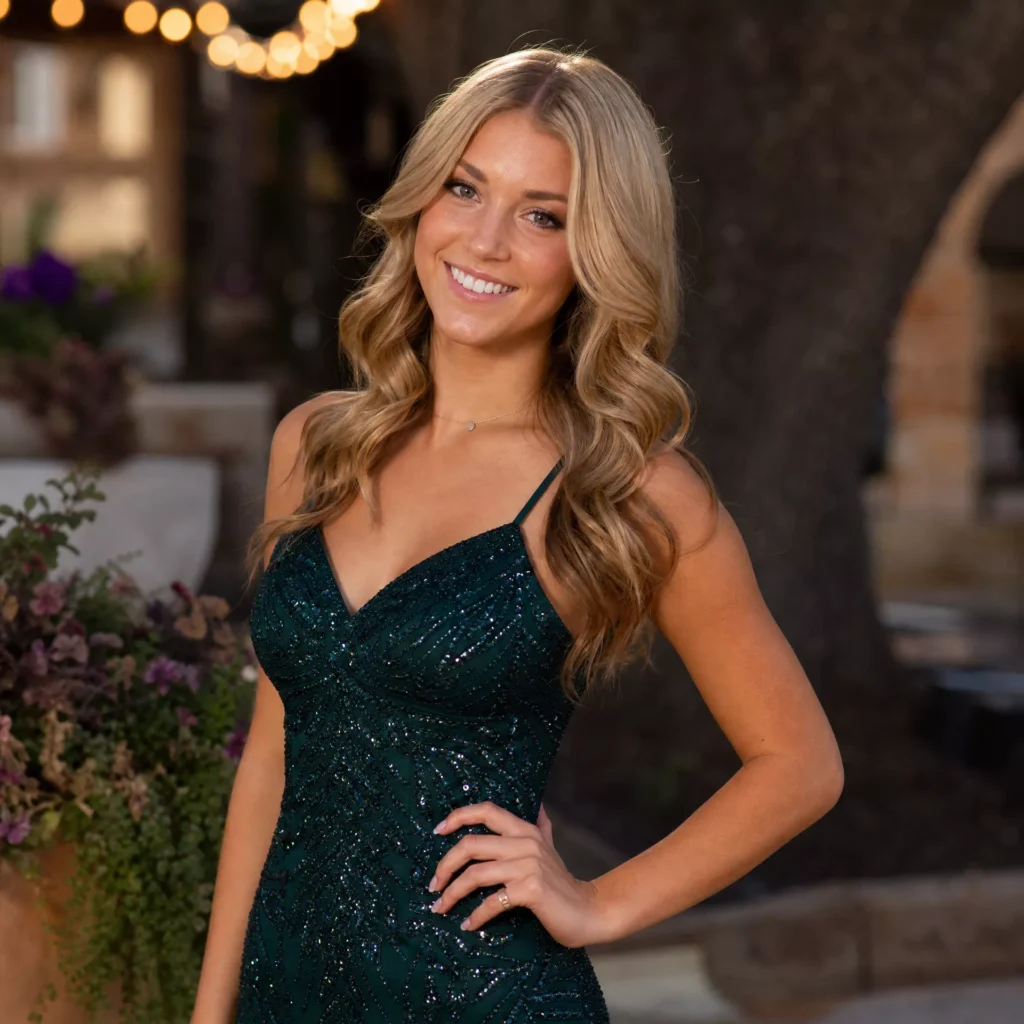
Defined but relaxed curls worn down. It works on shoulder-length hair and longer. Fine or very straight hair may drop curls sooner, so letting each curl cool before you touch it helps. Naturally curly hair can wear its own curls instead.
You’ll need: a 1-inch curling wand or iron, heat protectant, sectioning clips, and a light hairspray.
- Start with completely dry hair and apply heat protectant as the product directs.
- Clip the top half of your hair out of the way.
- Take a section about 1 to 2 inches wide and wrap it around the barrel, directing it away from your face.
- Hold for a few seconds, release the curl into your palm, and let it cool.
- Work around the lower half, then let down the top half and repeat.
- Once every curl has cooled, separate them gently with your fingers and mist lightly with hairspray.
Time and difficulty: about 15 to 40 minutes depending on length and density. Beginner with practice.
If it goes wrong: if curls fall quickly, use smaller sections and let each one cool fully. If they look too tight, wait for them to cool, then brush through gently to loosen them.
Braided Half-Up for Homecoming
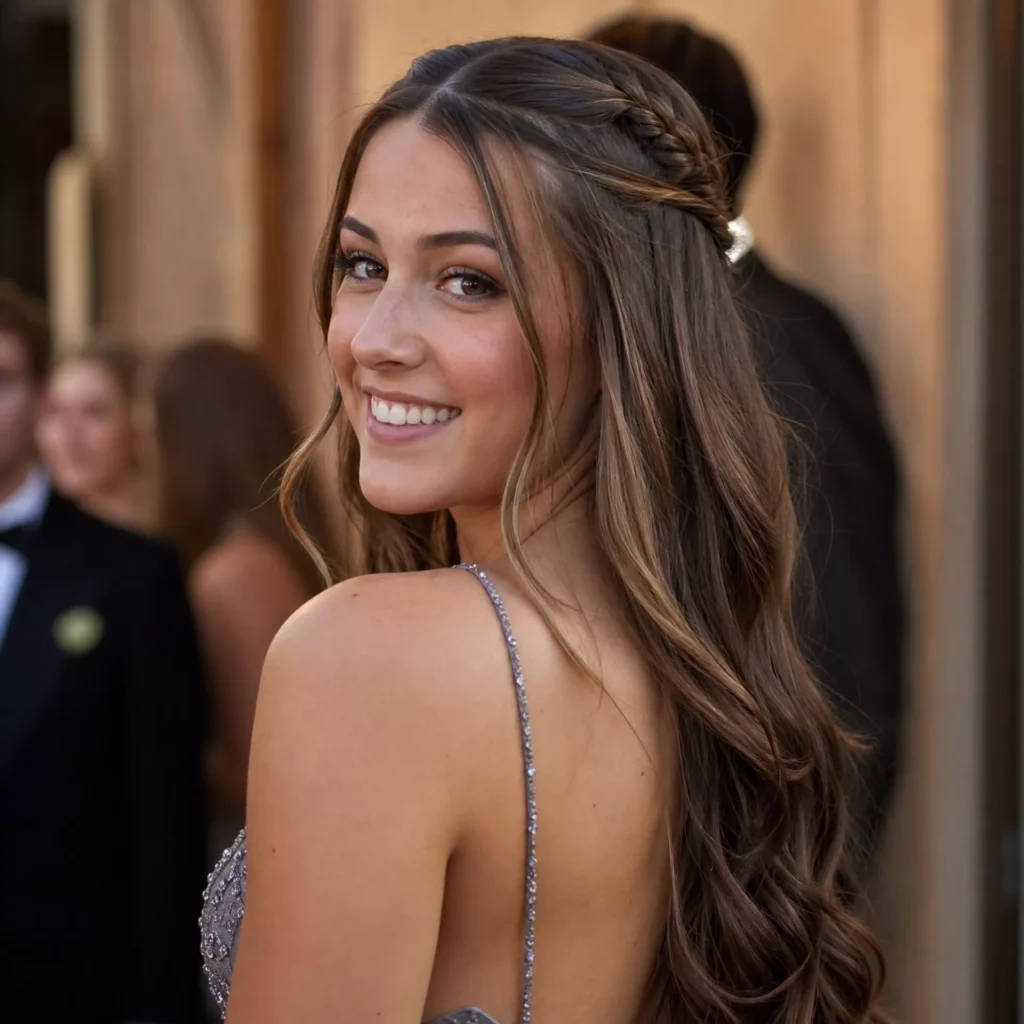
Two small braids, one from each side of the face, meet at the back of the head while the rest of the hair stays loose. It suits medium to long hair. Short layers near the face may slip out, so keep a few pins handy.
You’ll need: two clear elastics, one extra elastic or a decorative clip, and a few bobby pins.
- Take a section about 1 inch wide from above one ear.
- Braid it into a simple three-strand braid and secure the end with a clear elastic.
- Repeat on the other side.
- Bring both braids to the back of your head and join them with an elastic or clip just below the crown.
- Pin where they meet if they feel loose.
- Gently pull the edges of each braid outward to make them look fuller.
Time and difficulty: about 10 to 15 minutes. Beginner.
If it goes wrong: if one braid looks shorter or tighter, loosen it slightly or join the two at a different point so they look balanced.
Twisted Low Bun for Homecoming
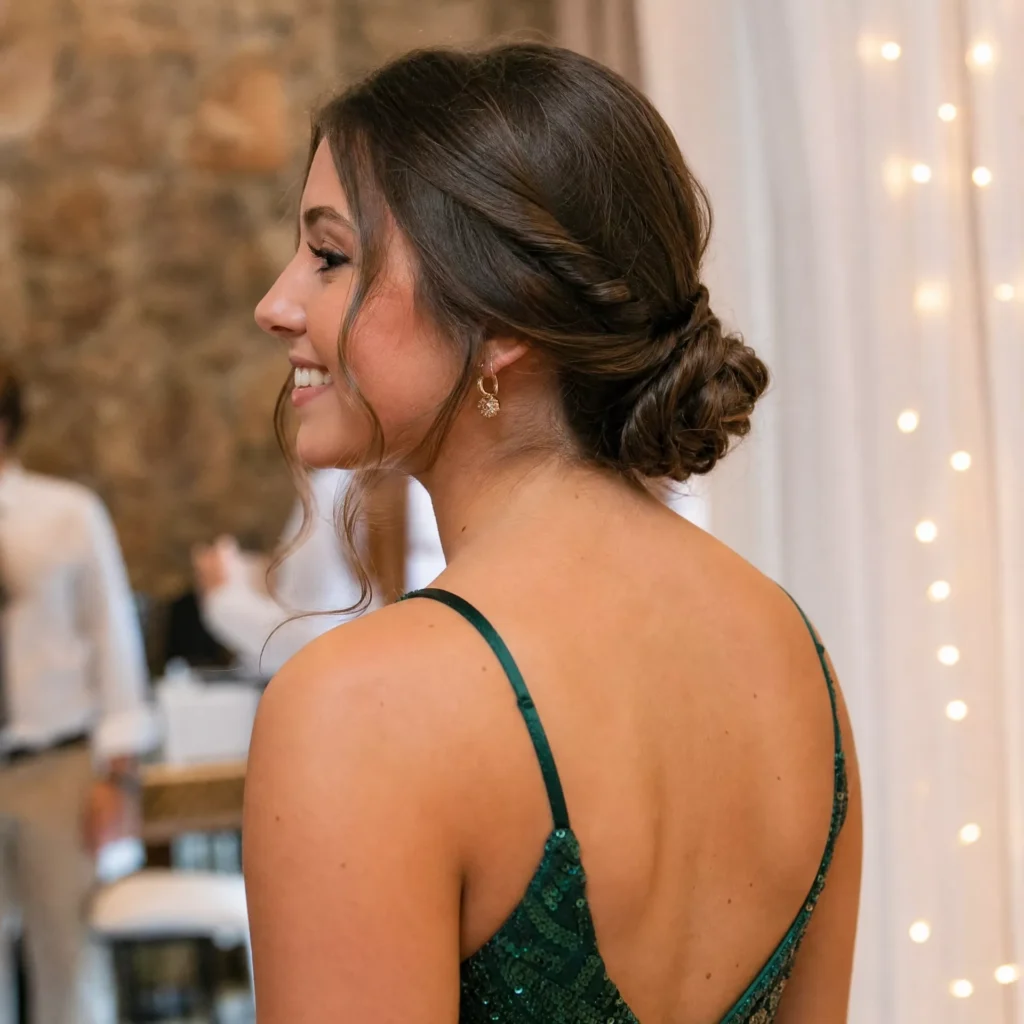
A low bun made from two twisted sections, which gives it a rope-like texture. It looks more detailed than the simple low bun and suits medium to long hair.
You’ll need: an elastic and 4 to 6 bobby pins.
- Gather your hair into a low ponytail at the nape and secure it.
- Split the ponytail into two equal sections.
- Twist each section in the same direction, for example clockwise.
- Wrap the two twisted sections around each other in the opposite direction.
- Coil the rope around the base of the ponytail to form a bun.
- Pin it at several points.
Time and difficulty: about 10 to 15 minutes. Beginner with practice.
The detail that matters: twisting each section one way, then wrapping them together the other way, is what keeps the rope from unraveling. If it comes undone, check the directions.
Claw Clip Updo for Homecoming
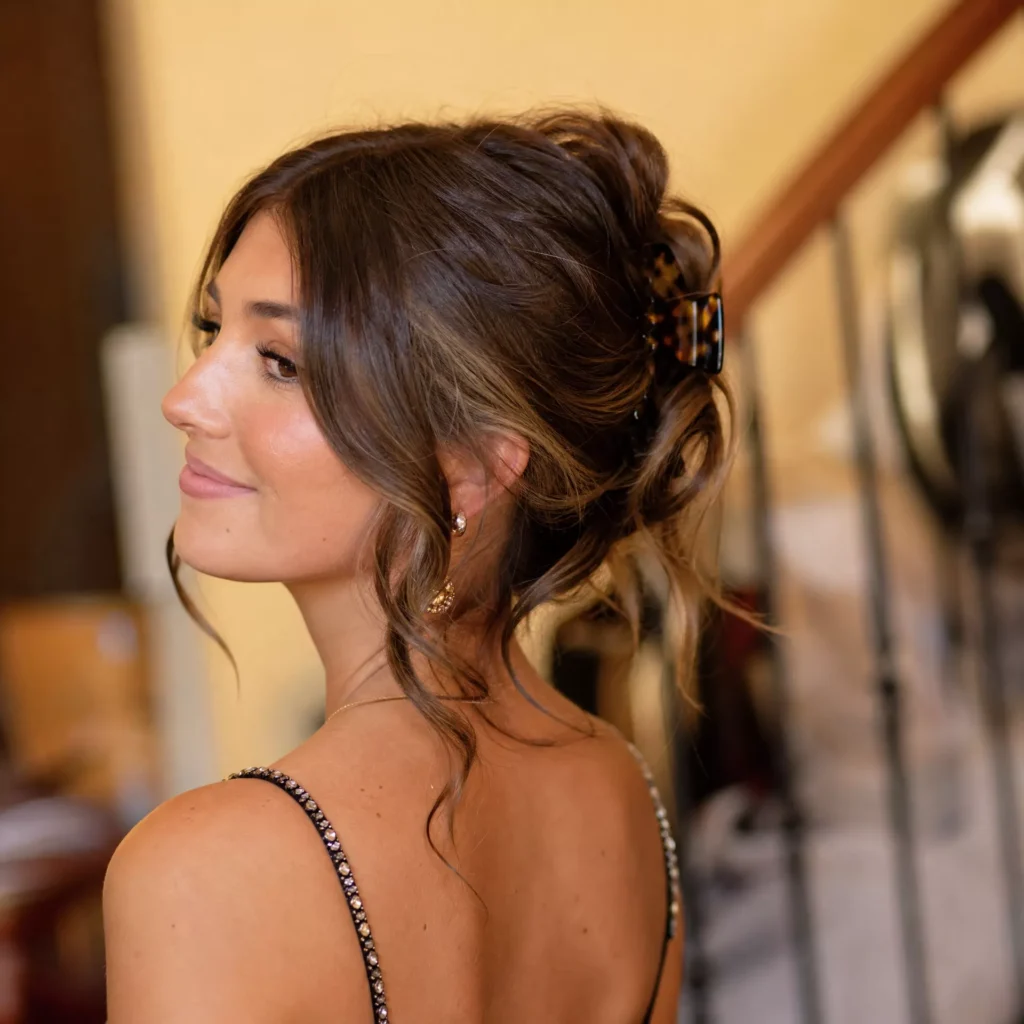
The hair is twisted, folded up the back of the head, and held with a claw clip, with the ends spilling over the top. It works on shoulder-length hair and longer, provided the clip suits the amount of hair. Very long or dense hair needs a large, strong clip.
You’ll need: a claw clip sized for your hair.
- Gather all your hair at the nape.
- Twist it upward a few times.
- Fold the twist up against the back of your head.
- Clip across the twist with the teeth facing down.
- Arrange the ends over the top of the clip.
Time and difficulty: about 1 to 5 minutes once you’ve practiced the twist. Beginner.
If it goes wrong: if the clip slips, try a larger clip, twist more tightly, or tuck a bobby pin under the clip into the twist. Move your head around before leaving to check that it holds.
Space Buns for Homecoming
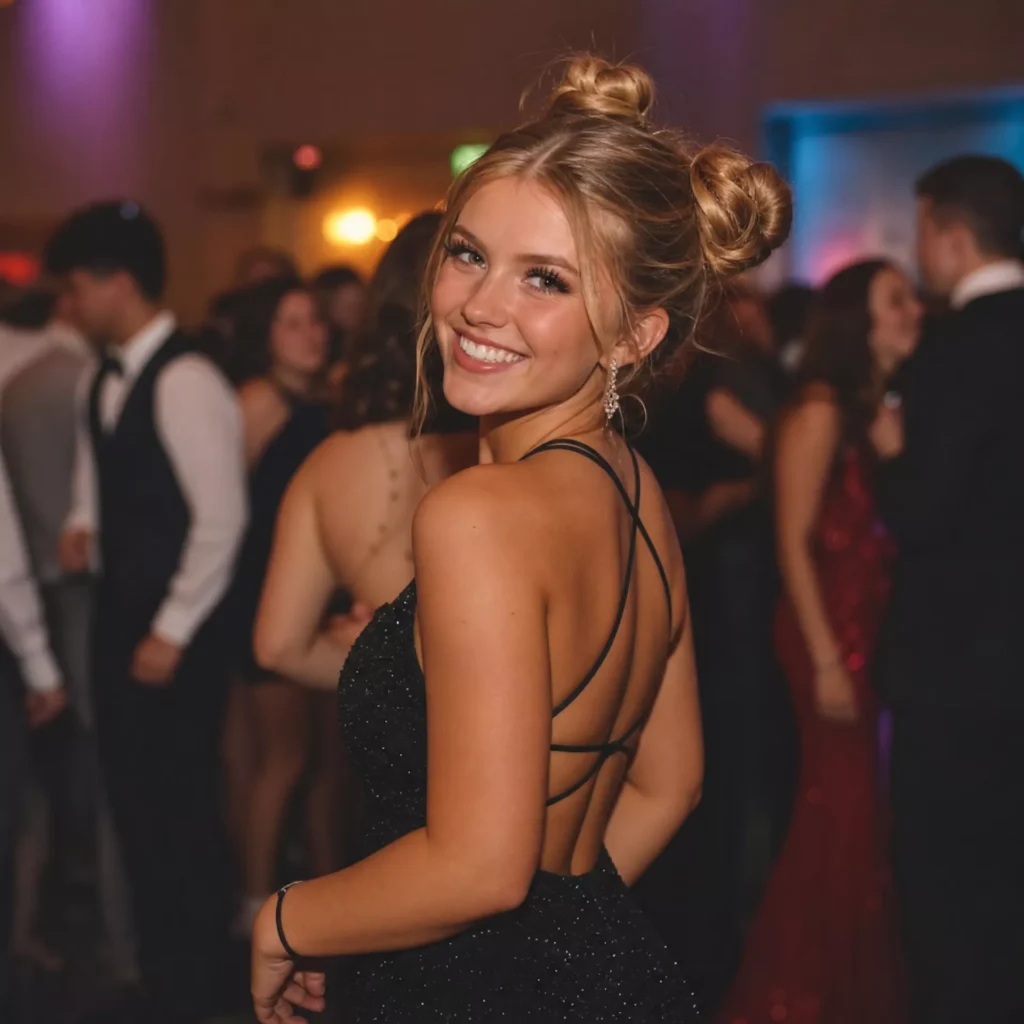
Two buns placed high on either side of the head, giving a playful silhouette. It suits shoulder-length hair and longer. Whether it fits the occasion depends on the dance’s theme and your outfit, so it often works best for themed or casual events.
You’ll need: a comb, two elastics, and 6 to 8 bobby pins.
- Part your hair down the center from front to back.
- Clip one side out of the way.
- Gather the other side high on the head and secure it with an elastic.
- Twist the ponytail and wrap it around the base to form a bun, then pin it.
- Repeat on the other side, matching the height.
Time and difficulty: about 10 to 15 minutes. Beginner.
If it goes wrong: if the buns look uneven, check that the part is straight and adjust the placement before pinning fully. Looking straight into a mirror helps you match them.
Side Braid for Homecoming
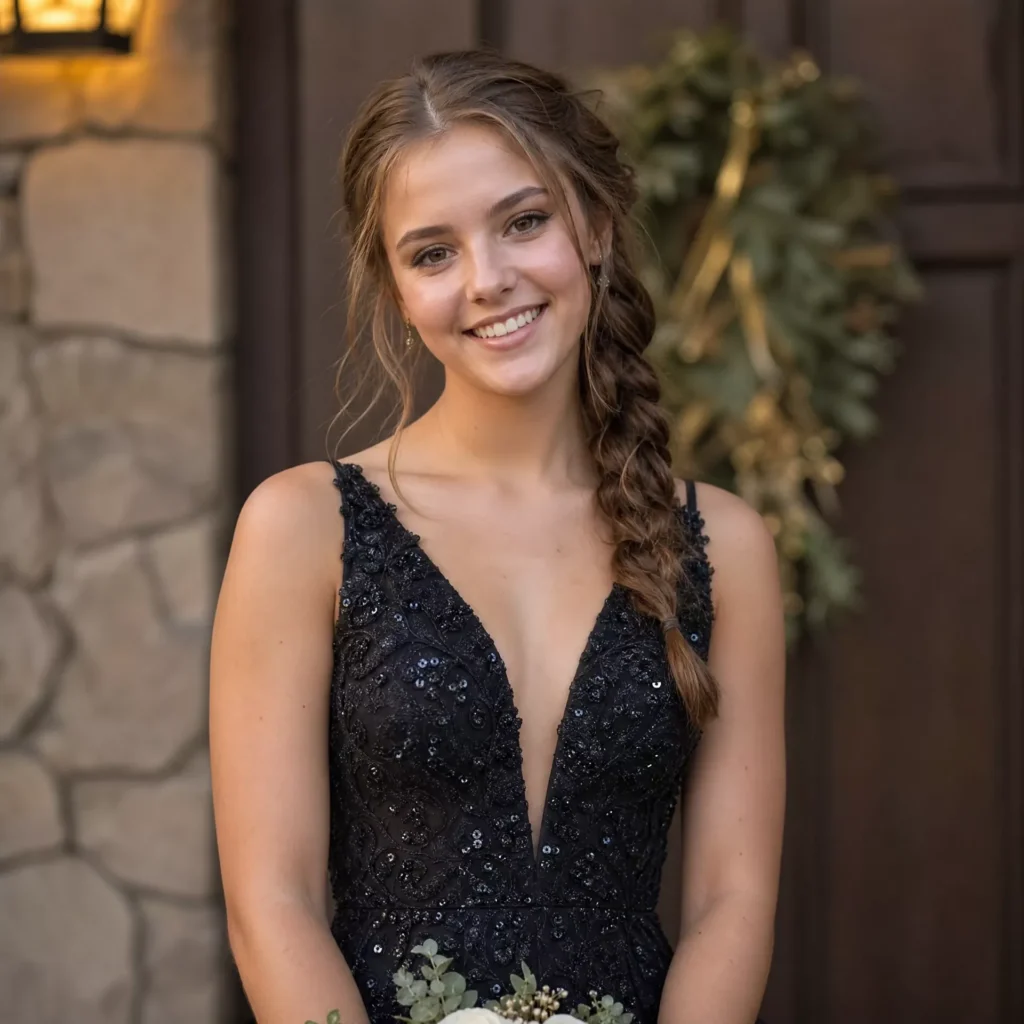
All the hair is swept over one shoulder and braided into a simple three-strand braid. It suits medium to long hair, and longer hair makes a fuller braid.
You’ll need: a brush, an elastic, and a couple of bobby pins.
- Brush all your hair to one side.
- If hair keeps slipping back, pin a small section behind the ear on the opposite side.
- Divide the hair over your shoulder into three sections.
- Braid down to the ends and secure with an elastic.
- Gently pull the edges of the braid outward for a fuller finish.
Time and difficulty: about 5 to 10 minutes. Beginner.
Tip: starting the braid slightly below the ear, instead of right at the nape, makes it sit more comfortably over the shoulder.
Curly Half-Up Puff for Homecoming
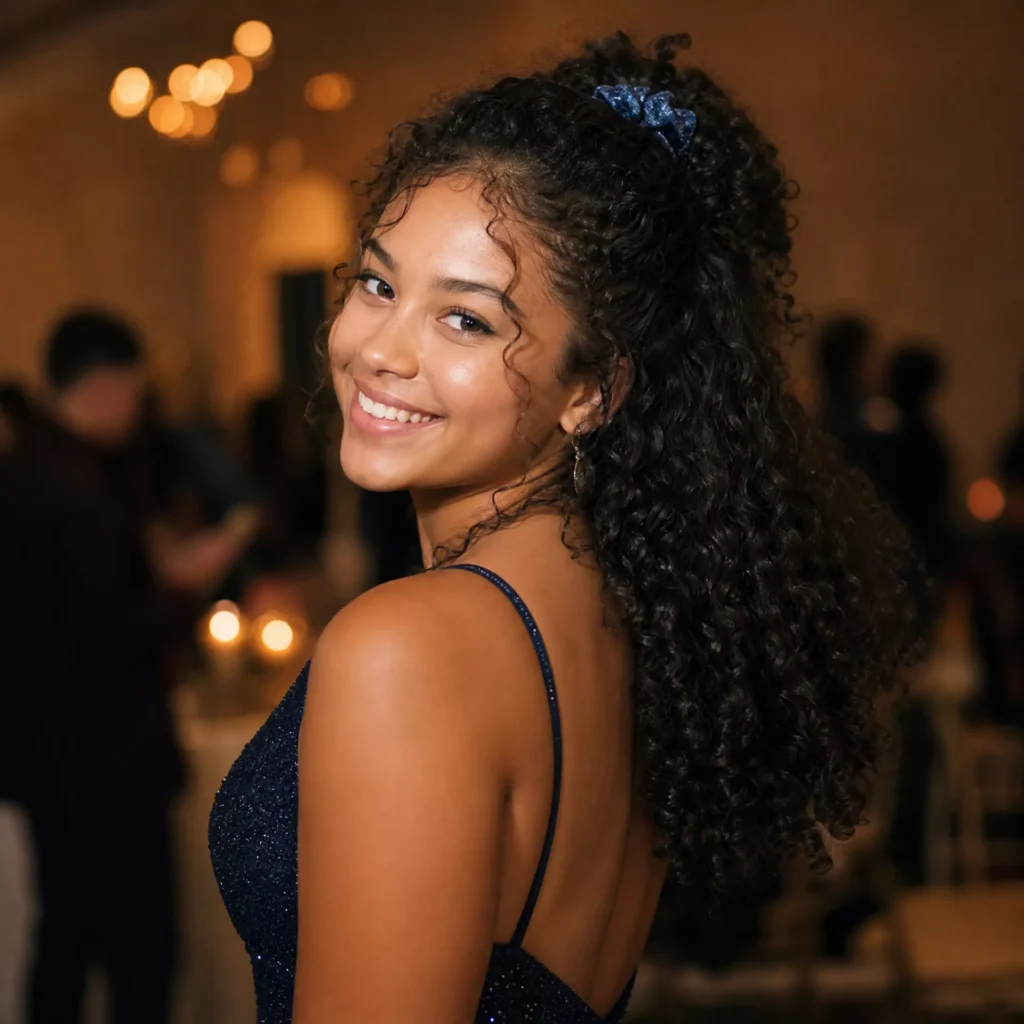
The top section of curly or coily hair is gathered into a puff, while the rest of the curls stay down. It works on most curl patterns and lengths and keeps your natural texture as the focus.
You’ll need: a scrunchie or stretchy band, water or a leave-in conditioner, and an edge brush if you use one.
- Refresh your curls with a little water or leave-in if they need it.
- Gather the top section with your hands, smoothing gently toward the crown.
- Secure it loosely with a scrunchie.
- Shape the puff with your fingers or a pick.
- Arrange the curls below as you like.
Time and difficulty: about 5 to 10 minutes. Beginner.
The detail that matters: keep the band gentle around the hairline to avoid tension on your edges. If the puff looks flat, gather a slightly larger section or fluff it gently with your fingers.
Voluminous Blowout for Homecoming
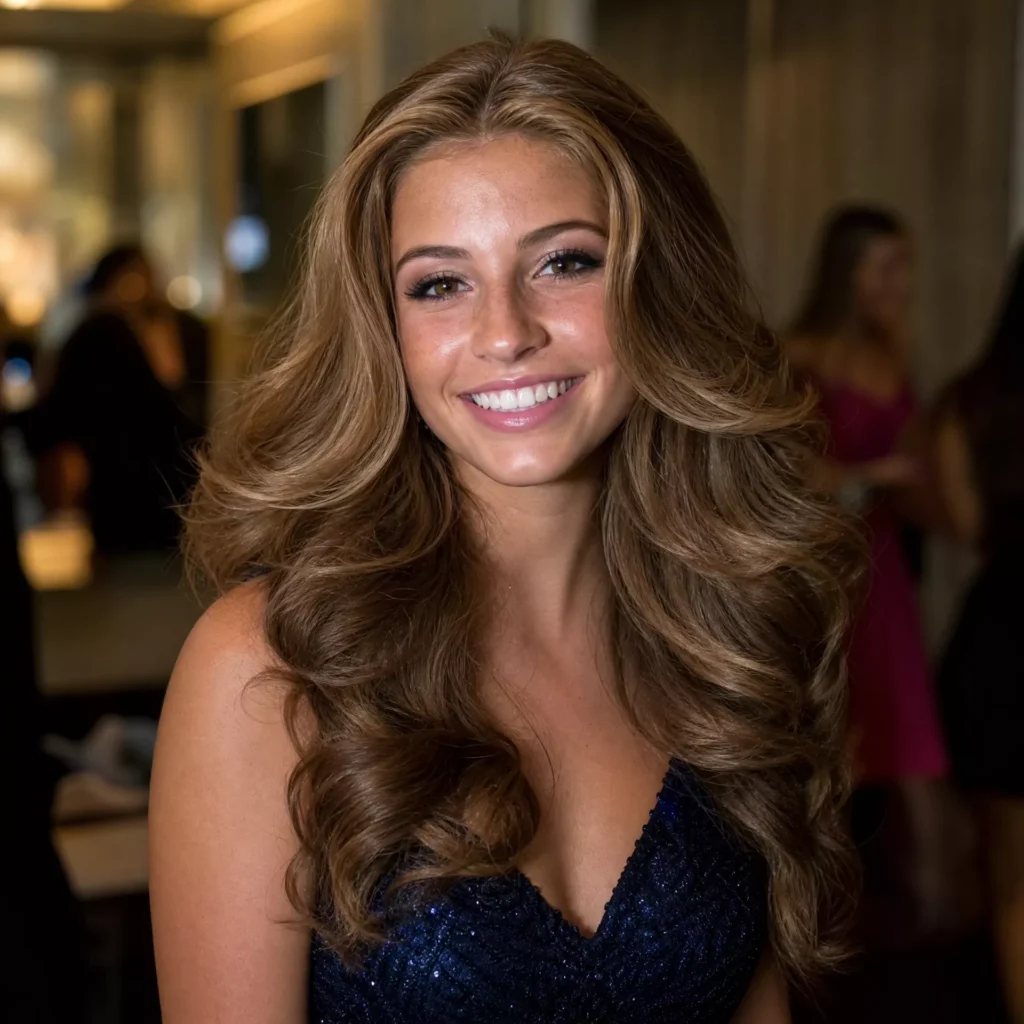
A round-brush blow-dry with lift at the roots and a soft bend at the ends. It works on short to long hair, though dense or long hair takes longer. Humidity can soften it during the evening.
You’ll need: a blow dryer with a nozzle, a round brush, heat protectant, and sectioning clips.
- Towel-dry your hair and apply heat protectant.
- Rough-dry with your fingers until it’s mostly dry.
- Clip the hair into sections.
- Working one section at a time, place the brush under the roots, lift upward, and dry while moving the brush down to the ends.
- Roll the ends around the brush, under or outward, and hold a moment.
- Use the cool-shot button on each section if your dryer has one.
Time and difficulty: about 20 to 45 minutes. Intermediate.
If it goes wrong: if your hair looks frizzy, point the nozzle down the hair shaft instead of at the roots. If it looks flat, dry the roots in the opposite direction from how they usually fall.
Quick Fishtail Braid for Homecoming
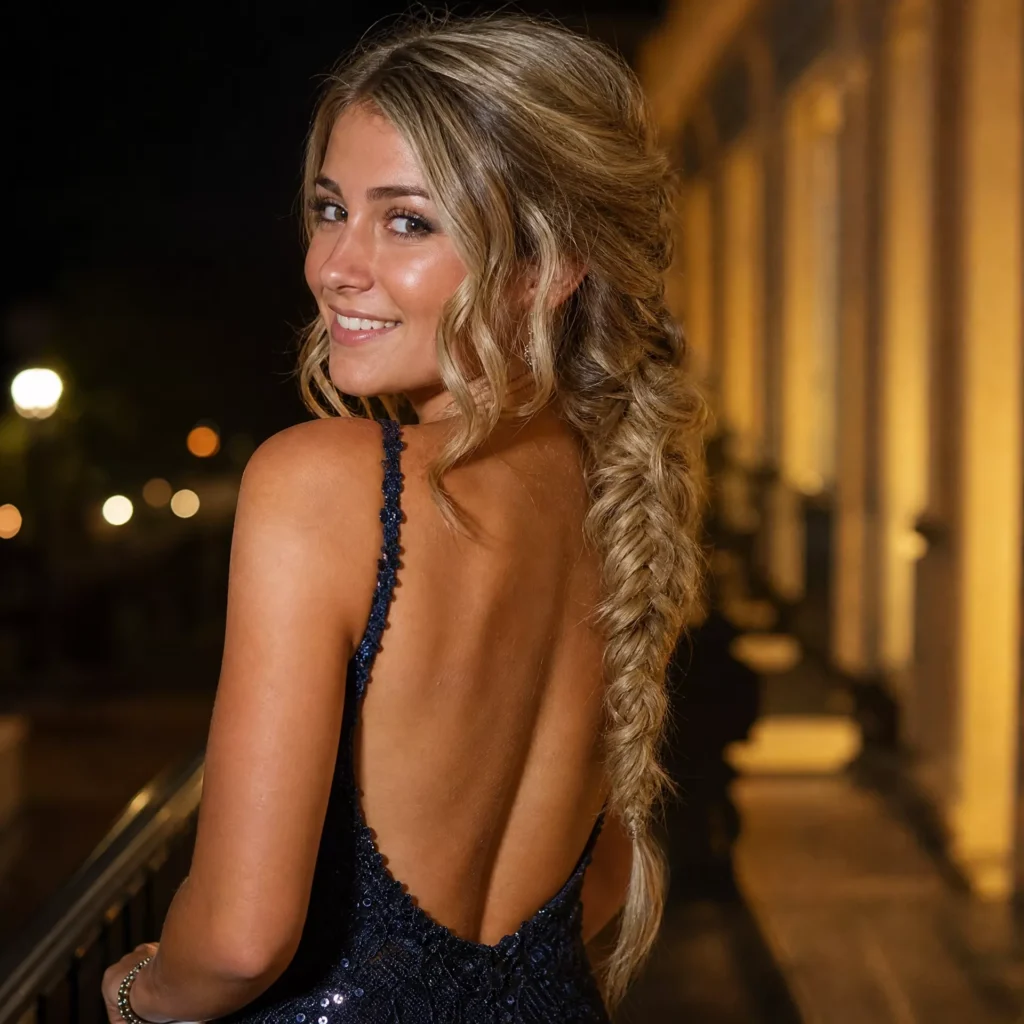
A braid with a fine, woven pattern made from two sections instead of three. It suits medium to long hair and takes some practice to keep even.
You’ll need: an elastic or two.
- If you’re new to fishtails, tie a loose ponytail first to keep the hair in place.
- Split the hair into two equal sections.
- Take a small piece from the outside of the left section and cross it over to the inside of the right section.
- Take a small piece from the outside of the right section and cross it over to the left.
- Repeat until you reach the ends, then secure with an elastic.
- Remove the first ponytail elastic if you used one, and gently pull the edges outward.
Time and difficulty: about 10 to 20 minutes, longer on first attempts. Beginner with practice.
If it goes wrong: an uneven braid usually comes from taking different-sized pieces, so try to keep each piece small and similar.
Twisted Crown for Homecoming
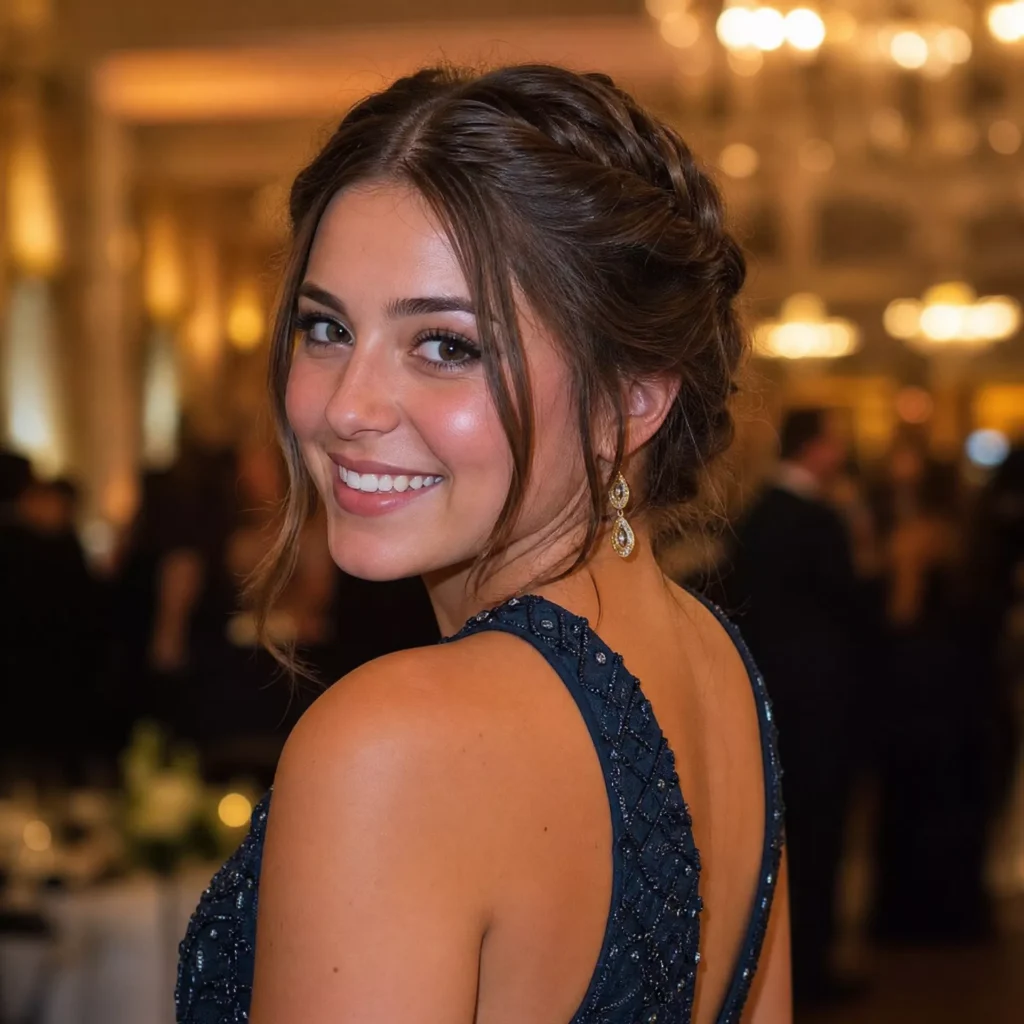
Two sections from the front are twisted back and pinned together at the back, forming a halo that looks similar to a crown braid without any braiding. It suits medium to long hair.
You’ll need: 4 to 6 bobby pins.
- Take a section from above one temple.
- Twist it backward, away from your face, adding a little more hair as you go if you like.
- Hold the twist at the back of your head.
- Repeat on the other side.
- Cross the two twists at the back and pin them together, crossing the pins for a firmer hold.
Time and difficulty: about 10 to 15 minutes. Beginner.
If it goes wrong: if the twists fall out, twist them more tightly and pin across them instead of along them.
Textured Ponytail for Homecoming
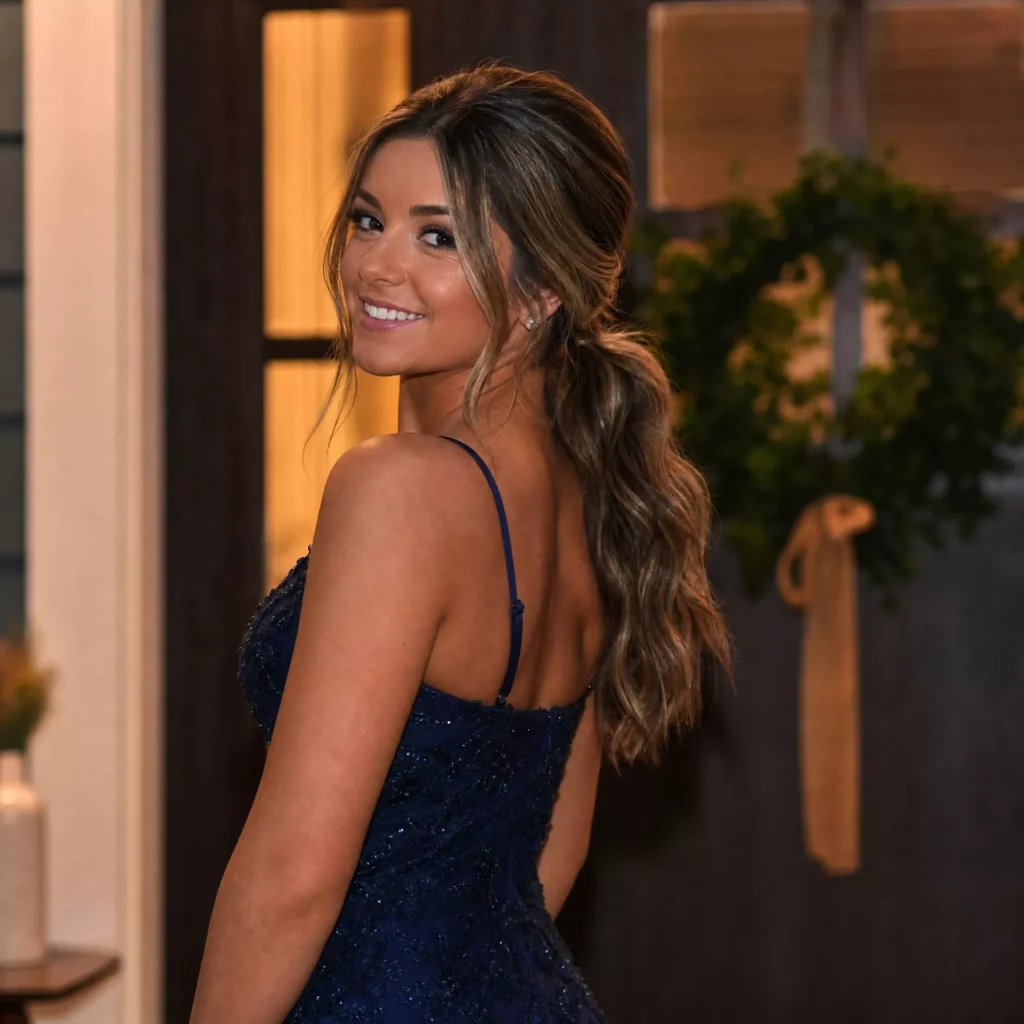
A mid-height ponytail with lift at the crown and texture through the length. It’s softer than the sleek high pony and suits medium to long hair.
You’ll need: texturizing spray, a fine-tooth comb, an elastic, a bobby pin, and a curling wand if you want waves in the tail.
- Spray texture through dry hair.
- Gently backcomb a small section at the crown.
- Gather the hair at mid-height and secure it.
- Wrap a strand around the elastic and pin it underneath.
- Add texture to the tail with spray or a few loose waves.
Time and difficulty: about 10 to 20 minutes. Beginner.
If it goes wrong: if it looks too messy, smooth the sides with a brush before securing and keep the texture to the tail.
Dutch Braid Pigtails for Homecoming
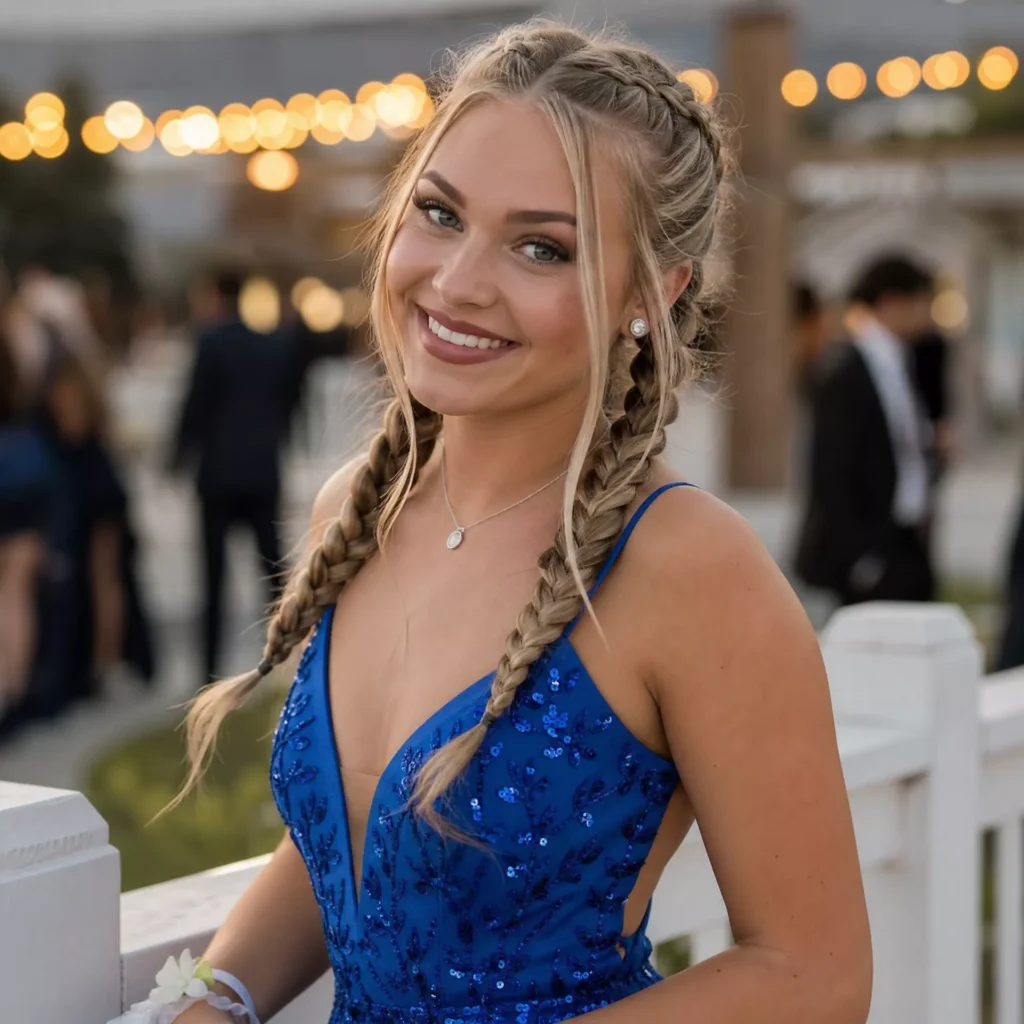
Two braids that sit raised on top of the hair, one on each side. A Dutch braid is made by crossing strands under the middle strand instead of over it. It suits medium to long hair and takes practice.
You’ll need: a comb, sectioning clips, and two elastics.
- Part your hair down the middle and clip one side away.
- At the front hairline, take three small strands.
- Cross the right strand under the middle, then the left strand under the middle.
- Before each cross, add a little loose hair to the outer strand.
- Continue to the nape, then braid the rest normally and secure it.
- Repeat on the other side, and gently pull the edges outward if you want fuller braids.
Time and difficulty: about 15 to 30 minutes. Intermediate.
If it goes wrong: if the braid lies flat instead of standing out, you’re crossing over instead of under.
Messy Romantic Updo for Homecoming
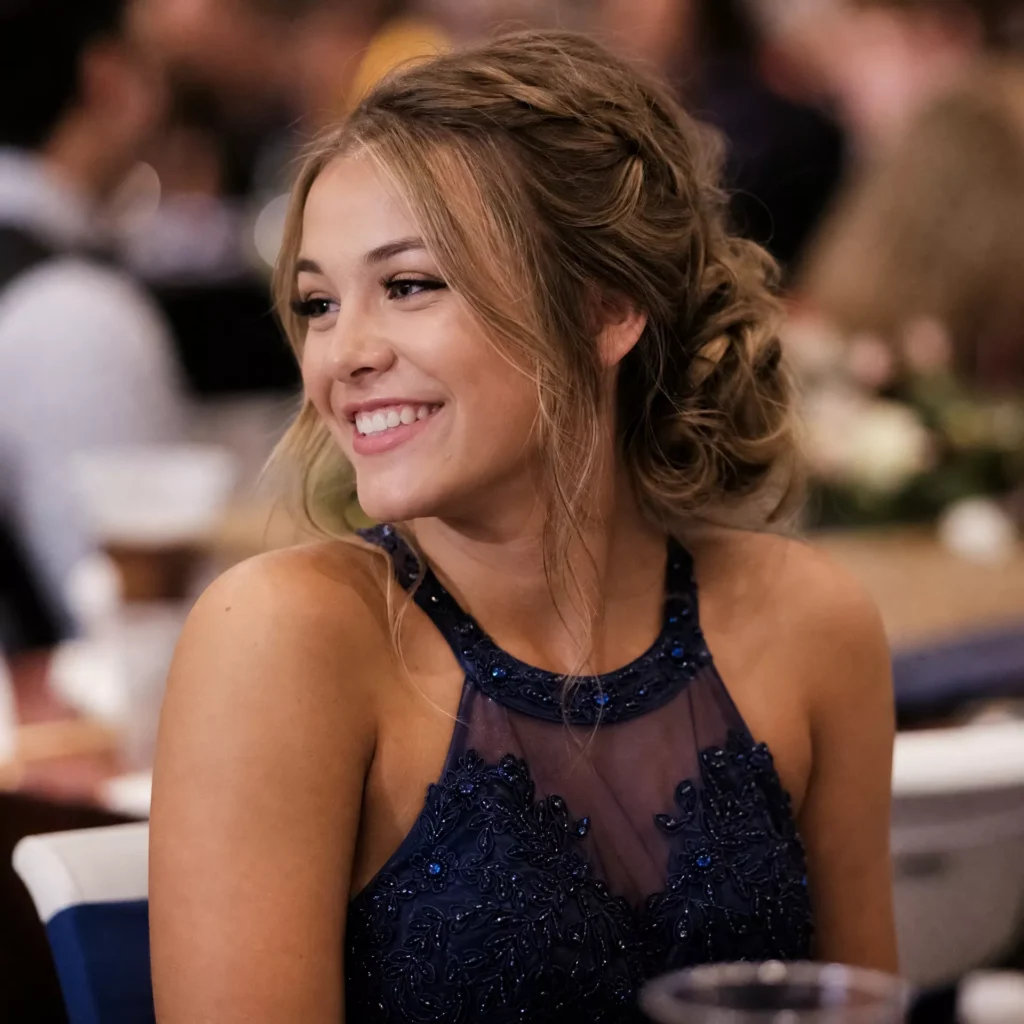
A loose chignon with deliberate texture and a few pieces left out. It suits medium to long hair. “Messy” here should still mean secure: the base needs to be firmly pinned even if the surface looks loose.
You’ll need: texture spray, an elastic, and 6 to 10 bobby pins.
- Spray texture through your hair.
- Gather it loosely at the nape and secure it with an elastic.
- Twist small sections of the ponytail and pin each one around the base.
- Pin firmly into the base so the structure holds.
- Pull a few pieces loose around the face and nape.
Time and difficulty: about 10 to 20 minutes. Beginner with practice.
If it goes wrong: if it starts falling apart, your pins are probably sitting only in the surface. Push them into the base elastic area instead.
Bobby Pin Design for Homecoming
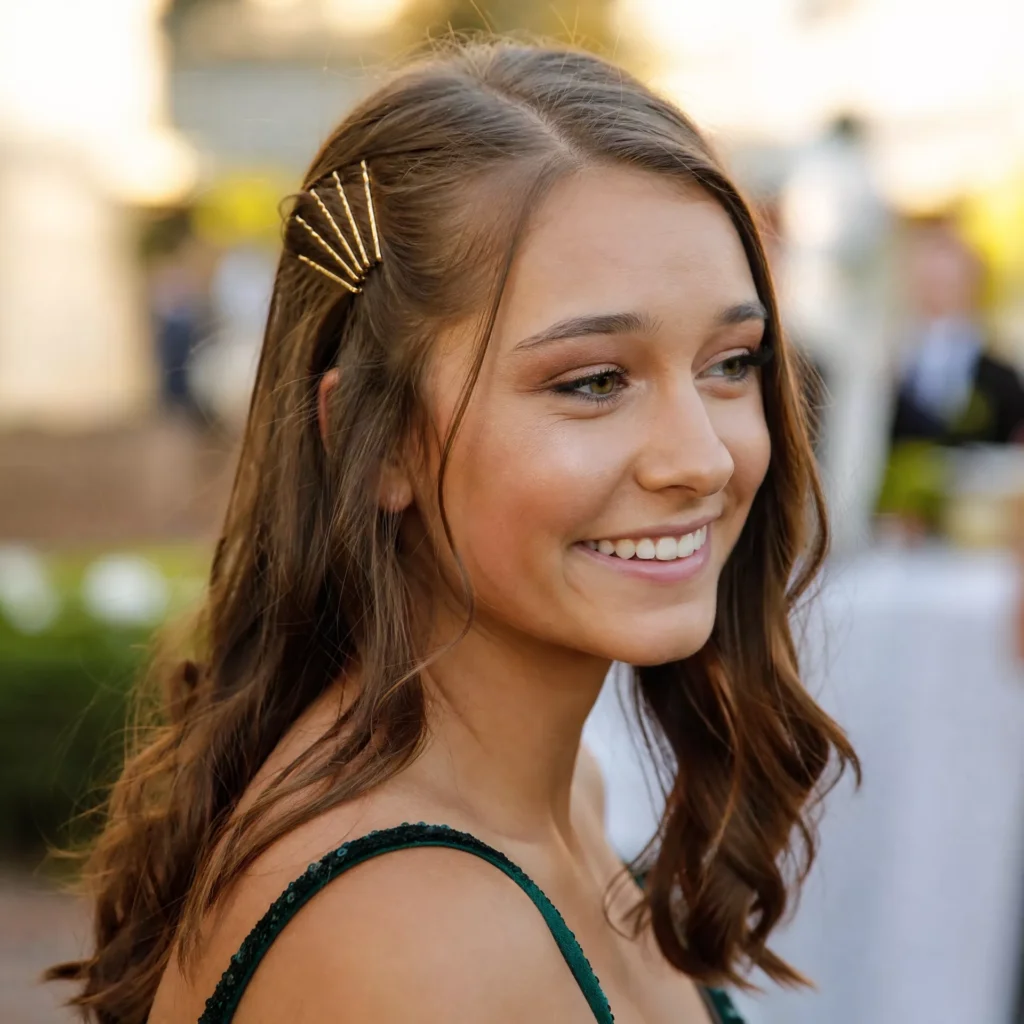
Decorative pins arranged in a pattern near the temple, behind the ear, or at the crown. It works on any length, including short hair, and on half-up or down styles.
You’ll need: metallic, pearl, or plain bobby pins.
- Choose where the design will sit.
- Smooth that section of hair flat.
- Place the pins in a pattern, such as an X, parallel lines, or a small triangle.
- Check that each pin catches enough hair to hold.
Time and difficulty: about 2 to 10 minutes. Beginner.
If it goes wrong: if the pins slide, add a little texture spray first or twist the section lightly before pinning.
Knotted Half-Up for Homecoming
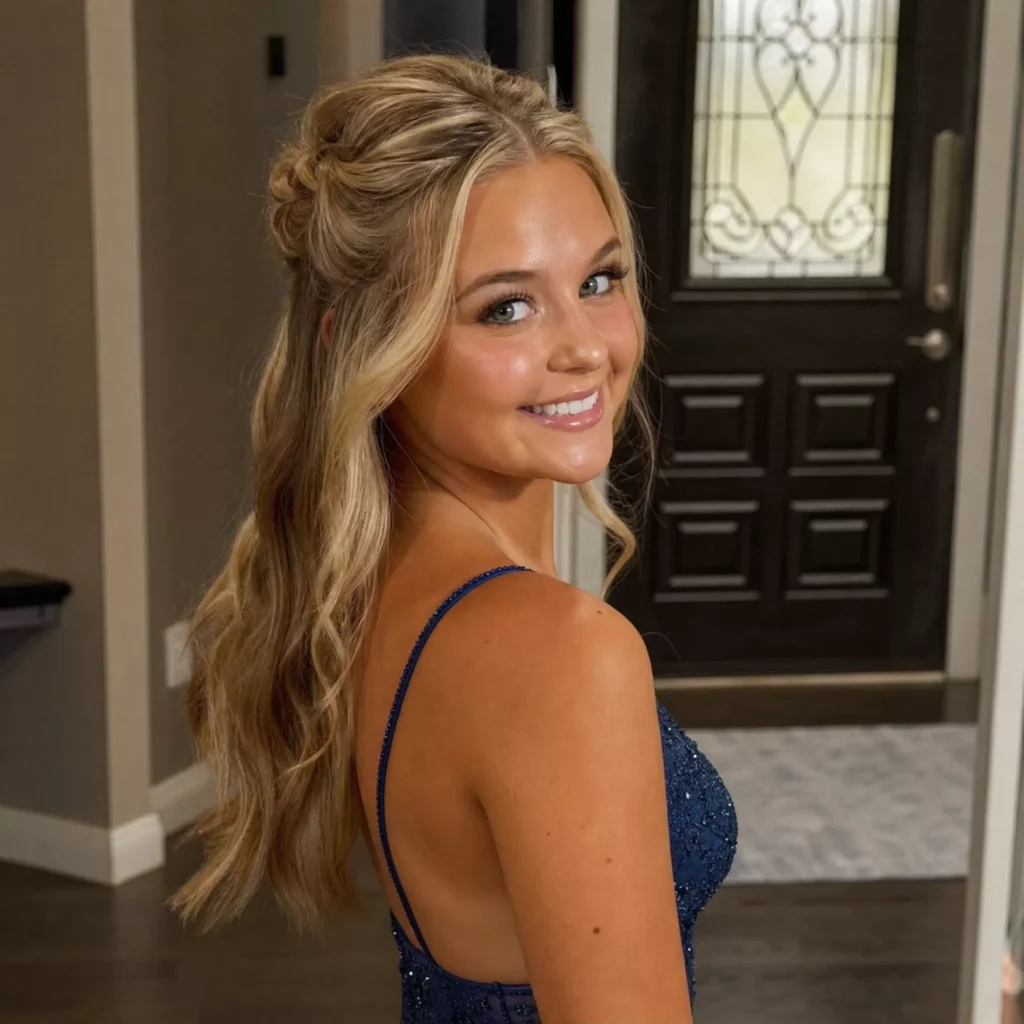
The top section is tied into a simple knot at the back of the head. It suits medium to long hair, since short hair may not reach far enough to tie.
You’ll need: a clear elastic or bobby pins.
- Take the top section of your hair from temple to temple.
- Split it into two equal pieces.
- Tie them once, like the first step of tying a shoelace.
- Secure the ends under the knot with a clear elastic or pins.
- Gently loosen the knot for a softer look.
Time and difficulty: about 5 to 10 minutes. Beginner with practice.
If it goes wrong: if the knot slips loose, tie the ends together underneath with a clear elastic.
Straight and Sleek with Accessories
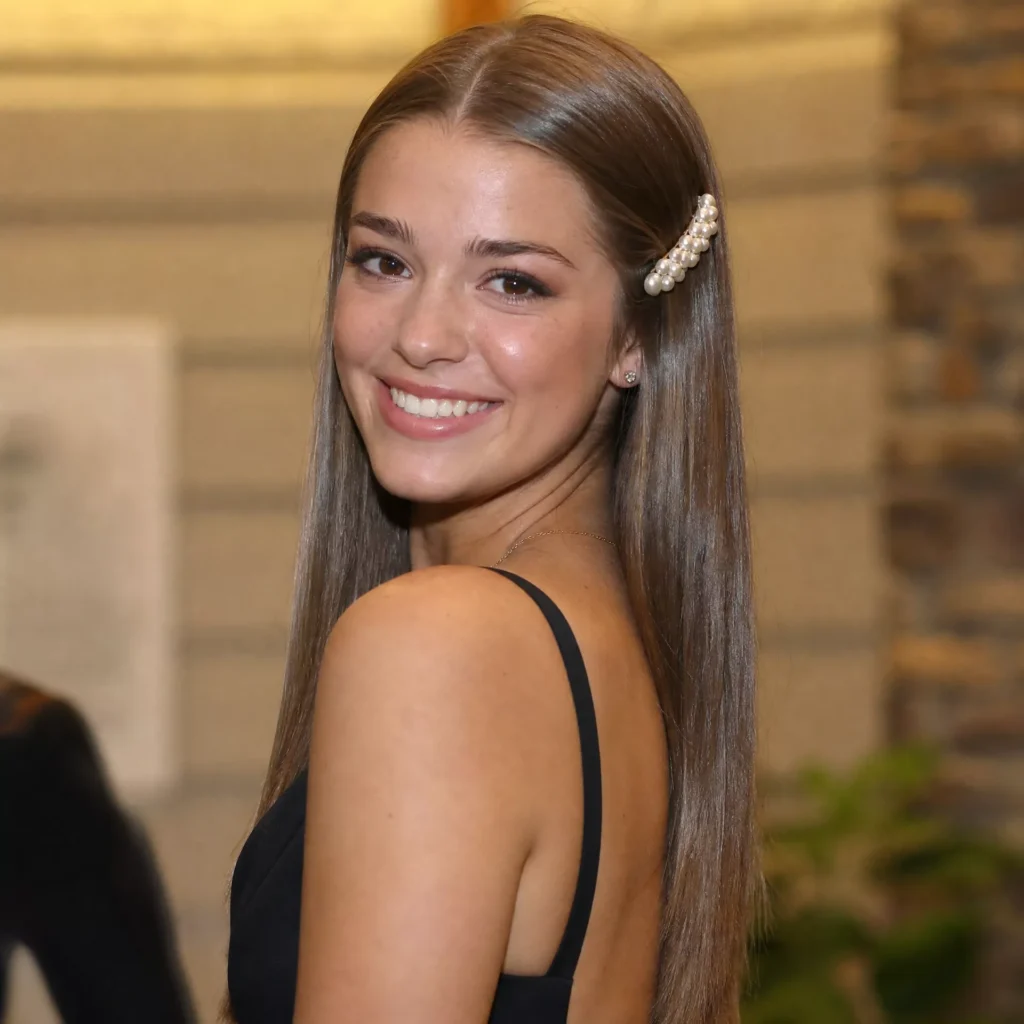
Smooth hair with a statement accessory, such as a headband, pearl clip, or embellished barrette. It suits any length, including short hair.
You’ll need: an accessory, a brush or flat iron if needed, and a bobby pin.
- Smooth your hair, either naturally or with a flat iron or blow-dry.
- Part your hair where you like.
- Place the accessory.
- Secure it with a hidden bobby pin if it slips.
Time and difficulty: about 5 to 30 minutes, depending on whether you straighten. Beginner.
Tip: if your dress has a lot of detail, one accessory is usually enough.
Curling Wand Waves for Homecoming
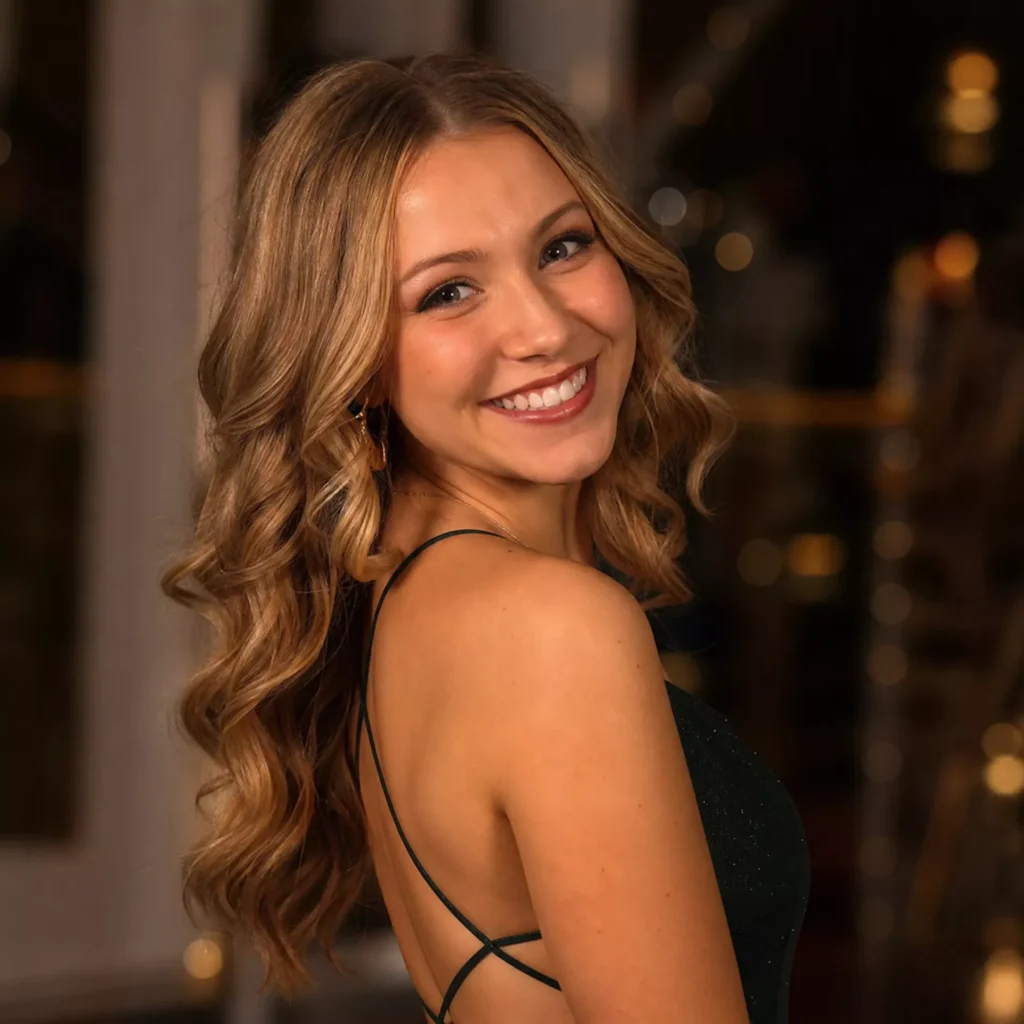
Waves made by alternating the direction of each curl, which gives a looser, more natural pattern than uniform curls. It suits shoulder-length hair and longer.
You’ll need: a curling wand, heat protectant, sectioning clips, and light hairspray.
- Apply heat protectant to dry hair.
- Section your hair.
- Wrap each section around the wand, alternating the direction for each new section.
- Leave the last inch or so of the ends out of the wand for a softer finish.
- Let all the waves cool.
- Shake them loose with your fingers and mist lightly with hairspray.
Time and difficulty: about 15 to 40 minutes. Beginner with practice.
If it goes wrong: if they look too curly, use larger sections next time, or brush through gently once cool.
Bun with Ribbon for Homecoming
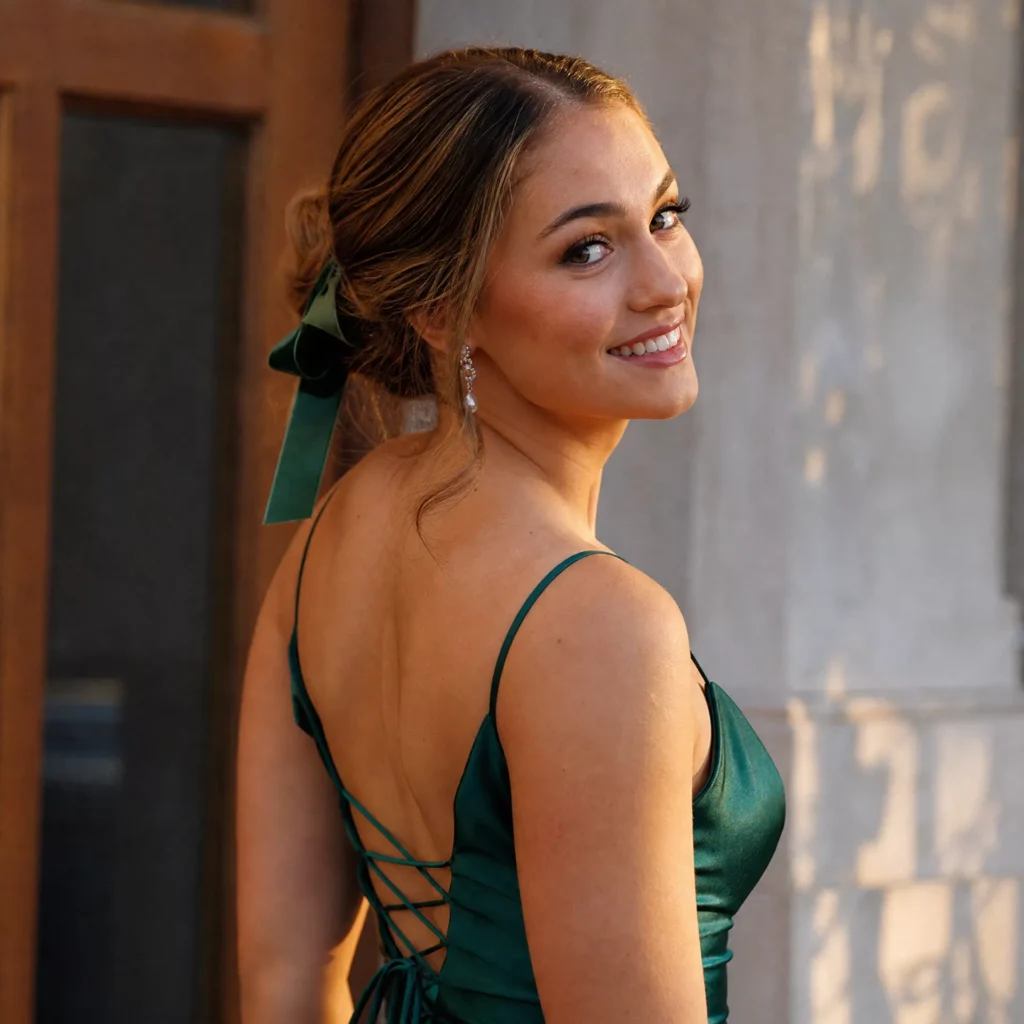
A simple bun with a ribbon tied around its base. It suits medium to long hair.
You’ll need: an elastic, bobby pins, and a ribbon.
- Make a bun at your chosen height, high, mid, or low.
- Wrap the ribbon around the base.
- Tie a knot or bow.
- Pin through the ribbon into the bun so it doesn’t slide.
Time and difficulty: about 5 to 10 minutes. Beginner.
Tip: check the ribbon’s length. Long trailing ends can tangle in your hair or catch on your outfit.
French Tuck Style for Homecoming
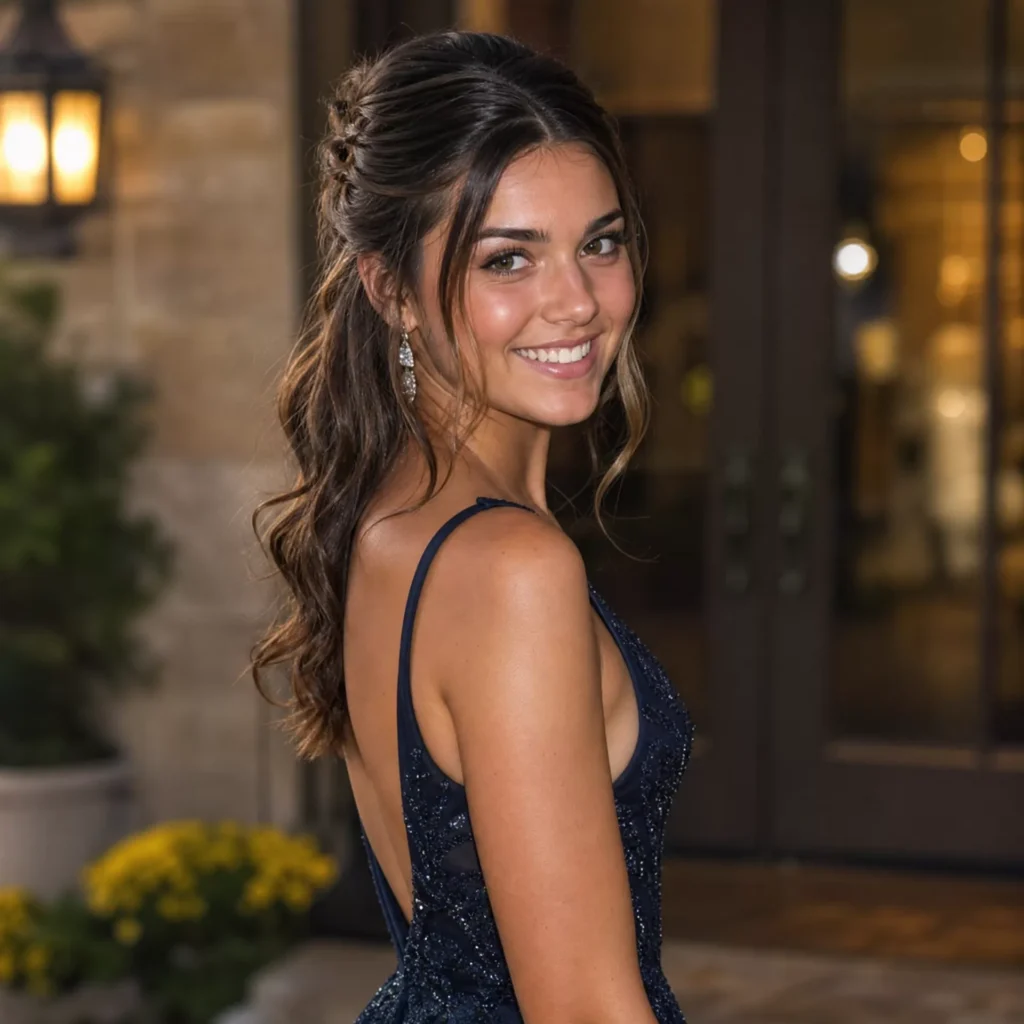
The front and side sections are rolled back and tucked, then pinned, while the back stays down. It’s a partial updo that frames the face differently from a simple half-up. It suits medium to long hair.
You’ll need: 6 to 8 bobby pins.
- Take a section from one temple.
- Roll it backward toward the back of your head, tucking the ends under as you go.
- Pin the roll in place.
- Repeat on the other side.
- Join the two rolls at the back and pin them together.
Time and difficulty: about 10 to 15 minutes. Beginner with practice.
If it goes wrong: if the rolls look bulky, take smaller sections and roll them a little more tightly.
Low Side Ponytail for Homecoming
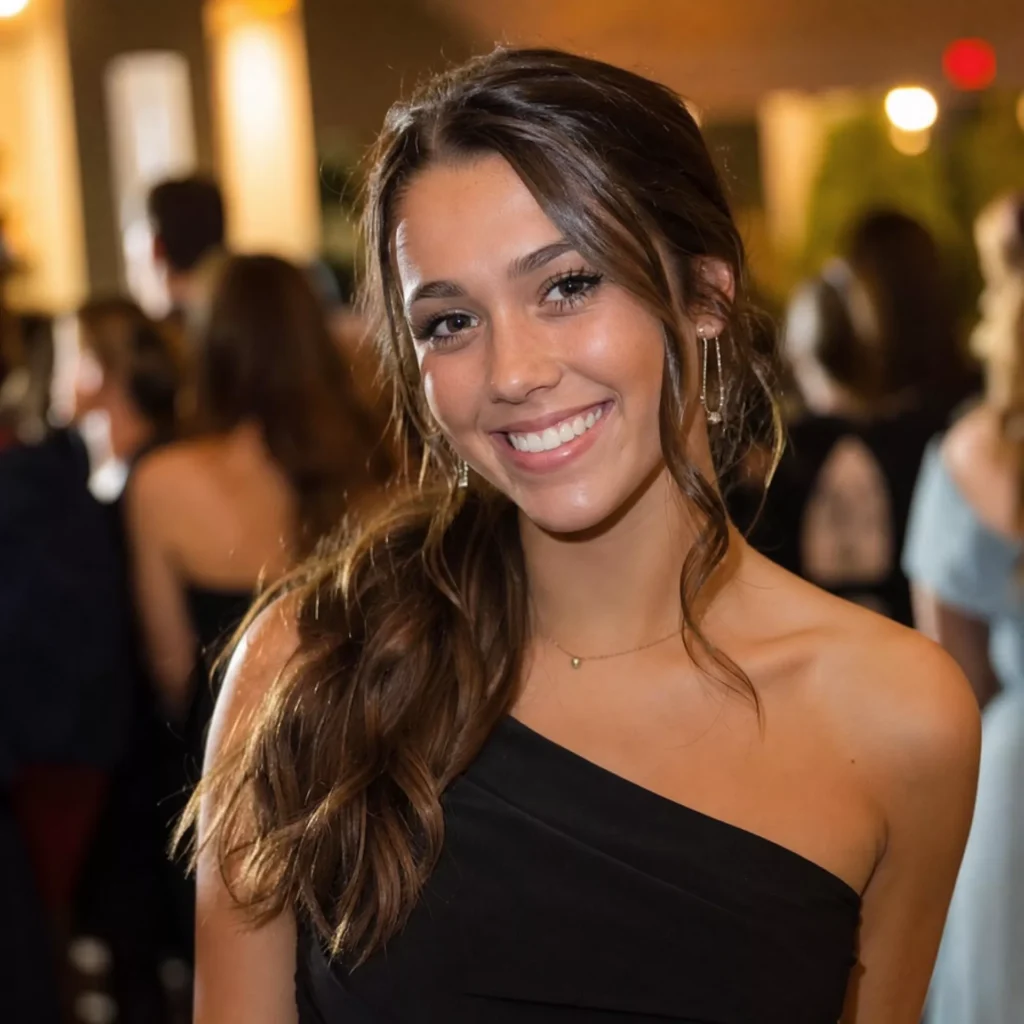
A ponytail gathered low on one side, below the ear, so it falls over one shoulder. It works well with one-shoulder or asymmetric dresses and suits medium to long hair.
You’ll need: a brush, an elastic, bobby pins, and a curling wand if you want curls in the tail.
- Sweep your hair to one side.
- Pin the hair on the opposite side behind the ear so it stays in place.
- Gather the hair below the ear on the chosen side.
- Secure it, wrap a strand around the elastic, and pin.
- Curl or texture the tail if you like.
Time and difficulty: about 5 to 15 minutes. Beginner.
Tip: cross the pins behind the ear into an X for a firmer hold.
Quick Crown Braid for Homecoming
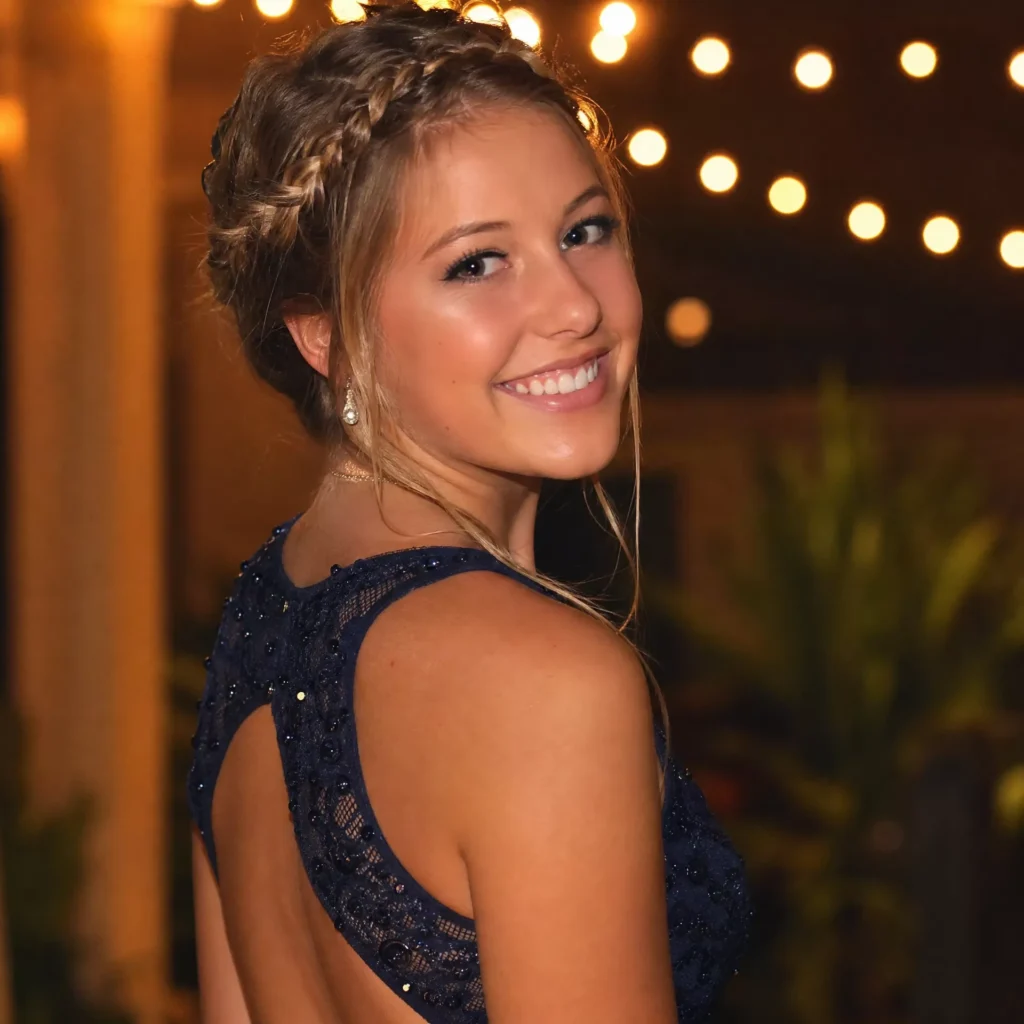
Two standard braids are wrapped across the top of the head and pinned, which creates the look of a crown braid without French braiding. It needs long hair, enough for each braid to reach across the head.
You’ll need: two elastics and 8 to 10 bobby pins.
- Part your hair down the middle.
- Braid each side into a regular three-strand braid and secure the ends.
- Bring one braid up over the top of your head and pin it along the way.
- Bring the other braid across just behind it and pin it.
- Tuck the ends under and pin them.
Time and difficulty: about 15 to 20 minutes. Beginner with practice.
If it goes wrong: if the braids slip, pin through them into the hair underneath, not just through the braid itself.
The Go-To Homecoming Style
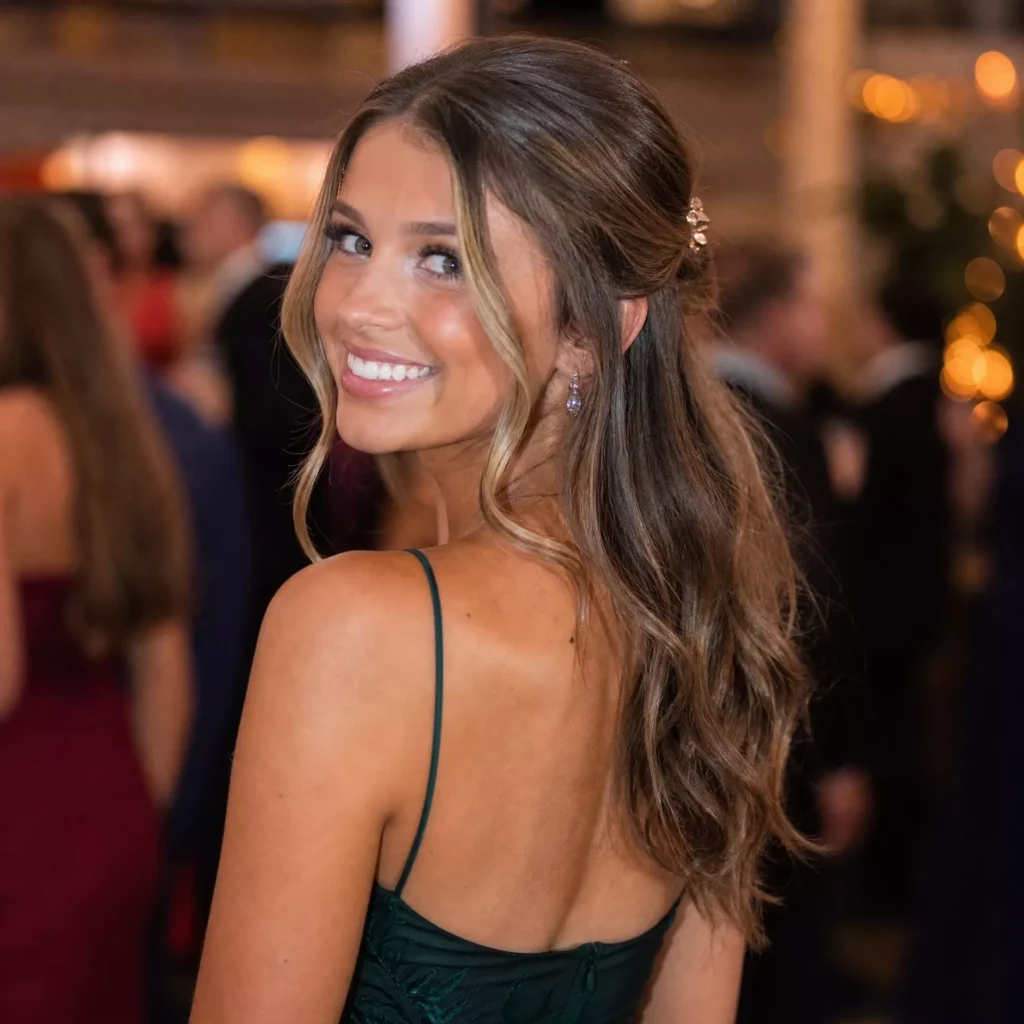
The hair is combed straight back with gel or pomade for a glossy, damp-looking finish. It works on short hair, including pixies and bobs, and on longer hair combed back and left down behind the ears or gathered low at the nape. It shows off earrings and makeup.
You’ll need: gel, pomade, or a strong-hold cream, plus a fine-tooth comb.
- Start with damp hair.
- Work the product through, focusing on the front and top.
- Comb your hair straight back from your face.
- Leave longer hair down behind the ears or gather it low.
- Let the product set without touching it.
Time and difficulty: about 5 to 15 minutes. Beginner.
If it goes wrong: if the product flakes as it dries, use less next time or switch to a cream. Test it a few days before, since some products take more than one wash to remove.
How to Choose a Homecoming Hairstyle for Your Hair Length
Short hair: the slicked-back wet look, straight and sleek with accessories, a blowout, and a bobby pin design all work well. Small twists or pins near the face add detail.
Bob-length hair: add half-up with volume, though the top section may be small. A claw clip may hold only part of the hair. The twisted crown and the knotted half-up need medium to long hair, because the twists and the knot need enough length to hold.
Medium hair: most buns, half-up styles, ponytails, and curls are realistic. Updos may need extra pins.
Long hair: nearly every style works. The quick crown braid and fishtail need longer hair, and heavy hair may need more support in high ponytails and updos.
Some styles need enough length to wrap or tie, but clip-in extensions are optional, not necessary.
How Hair Texture and Density Affect the Result
Texture describes the shape of each strand: straight, wavy, curly, or coily. Density describes how many strands you have.
- Fine or low-density hair may slip out of pins, so texture spray helps. A bun may look smaller, which is fine.
- Thick or high-density hair may need more pins, stronger elastics, and more time.
- Straight hair suits sleek styles but may drop curls, so letting curls cool helps.
- Wavy hair takes texture, messy updos, and waves easily.
- Curly and coily hair can wear natural texture in puffs, buns, twists, and braids. Shrinkage affects how much length you have.
You don’t need to change your natural texture. Choose styles that work with it.
How to Match Your Hairstyle to Your Homecoming Outfit
- Strapless and sweetheart: updos show the shoulders, while hair down or half-up adds coverage.
- One-shoulder: side braids and low side ponytails balance the bare side.
- High neck or halter: updos and high ponytails keep the neckline clear.
- Open back: updos show the back, while long hair down covers it.
- Detailed necklines or embellishments: simpler hair keeps the focus on the outfit.
Earrings show more with hair up. These are suggestions, not rules, and comfort matters as much as the look.
What You Need Before Styling Your Hair
- Reference photos of the style on hair similar to yours.
- Tools: brush, comb, elastics, plenty of bobby pins, a clip if needed, and heat tools if your style uses them.
- Products: only what your style needs, such as texture spray, smoothing cream, heat protectant, or hairspray.
- Accessories: chosen and tested in advance.
- Time: enough for adjustments.
Preparation depends on the style. Some updos grip better on second-day hair, while sleek styles often need freshly washed hair.
How to Make Your Hairstyle Last Longer
- Pin into the base of a style, not just the surface.
- Cross pins in an X for a firmer hold.
- Use hold products in moderation, since too much makes hair stiff or sticky.
- Consider humidity and heat, which loosen curls and frizz sleek styles.
- Avoid touching or adjusting your hair repeatedly.
- Carry a small touch-up kit with pins, an elastic, and a mini comb.
A secure style shouldn’t hurt. If it does, loosen it. Every style changes a little over an evening.
How to Use Heat Tools More Carefully
- Read the tool manufacturer’s instructions.
- Use a heat protectant suitable for your styling method.
- Start at a lower temperature and only increase if needed.
- Keep hot tools away from your scalp, ears, and skin.
- Let tools cool on a heat-safe surface before storing them.
- Consider heat-free styles, like braids, buns, and twists, if you’d prefer to avoid heat.
Heat protectant reduces damage but doesn’t eliminate it.
Common Homecoming Hairstyle Mistakes and How to Fix Them
- Poor sectioning: take smaller, even sections for curls and braids.
- The wrong claw clip: choose a size that fits your hair comfortably.
- Too much product: start with a little and add more only if needed.
- Tight hairstyles: loosen anything that hurts or pulls.
- Unrealistic reference photos: look for photos of hair similar to yours.
- Last-minute experiments: practice new styles at least once beforehand.
Which Hairstyles Work Best for Different Situations?
- Limited preparation time: claw clip updo, simple low bun, side braid, or a bobby pin design.
- Minimal tools: claw clip updo, knotted half-up, twisted crown, or side braid.
- Natural curls: curly half-up puff, space buns, twisted crown, or a curly low bun.
- Hair away from the face: sleek high pony, space buns, any updo, or the crown braid.
- Avoiding heat: braids, twists, buns, and the slicked-back wet look.
- Preferring hair down: loose curls, curling wand waves, a blowout, or sleek hair with an accessory.
A Practical Homecoming Hair Preparation Timeline
- A week or more before: choose your style and practice it once.
- A few days before: practice again if needed, and gather your tools and accessories.
- The day before: prepare your hair according to your style.
- On the day: allow extra time for adjustments.
- Before leaving: check the back with a mirror, add any loose pins, and pack your touch-up kit.
How to Choose Between Similar Hairstyles
Simple low bun or twisted low bun: the simple bun is smooth and quick. The twisted bun adds texture and takes a few extra minutes.
Half-up with volume, braided half-up, or knotted half-up: volume focuses on the crown, braids add detail at the sides, and the knot adds a structured shape at the back.
Loose curls, curling wand waves, or a blowout: curls are defined, waves are looser and alternated, and a blowout focuses on root lift and smoothness.
Claw clip updo or French tuck: the claw clip gathers all your hair up, while the French tuck pins the sides back and leaves the back down.
Sleek high pony, textured ponytail, or low side ponytail: the sleek pony is smooth and high, the textured pony is softer at mid-height, and the low side pony sits over one shoulder.
Twisted crown, quick crown braid, and other braids: the twisted crown uses twists, which are easier than braiding. The crown braid wraps two braids across the top. Dutch braids sit raised, side braids sweep over one shoulder, and fishtails have a finer pattern.
Frequently Asked Questions
What is the easiest homecoming hairstyle for beginners?
The claw clip updo, simple low bun, and side braid are good starting points.
Which homecoming hairstyles work for short hair?
The slicked-back wet look, sleek hair with accessories, a blowout, and a bobby pin design.
Can I style my hair without heat tools?
Yes. Braids, twists, buns, the claw clip updo, and the wet look don’t need heat.
How can I make my hairstyle last longer?
Pin into the base, use products in moderation, and carry a small touch-up kit.
Should I wash my hair on homecoming day?
It depends on your style. Some updos hold better on second-day hair, while sleek styles may need freshly washed hair.
How can I secure a claw clip updo?
Use a clip sized for your hair, twist tightly, and add a bobby pin under the clip.
Which styles work with natural curls?
The curly half-up puff, space buns, twisted crown, buns, and braids.
When should I practice my hairstyle?
At least a few days before, so you have time to adjust or choose another style.
How do I match my hairstyle to my dress?
Think about the neckline. Updos show off strapless and halter dresses, and side styles suit one-shoulder dresses.
What should I do if my first attempt doesn’t look right?
Try again with smaller sections or more pins, or choose a simpler style. Practice makes a difference.
Final Decision Guide
Narrow the list to two or three styles that fit your hair length and texture, your outfit, and the tools you already have. Consider how much time you’ll have and how comfortable you are with braiding or heat styling. Then gather your tools, practice your favorite at least once before the dance, and keep a simpler backup in mind in case the first choice doesn’t come together on the day.